Image optimization is the process of reducing the file size of an image without sacrificing its quality. If your website is having performance issues, including slow page loading times, image optimization can help resolve your problems.
Here’s an in-depth tutorial of the step-by-step process required to optimize website images. The process described below assumes that you’re not using a WordPress plugin for assistance.
#1 – Prepare The Image and Make Sure It’s Saved Properly
Even if you’re using an image optimizer or compression tool, there are a few things you need to do before running that image through compression.
First, make any necessary edits or enhancements to the image. Things like filters, cropping, contrast adjustments, exposure, saturation, and other edits should be handled before you proceed. You can continue using whatever image editing software you’re comfortable with for this step.
From here, it’s important that you save the image properly. For most website images, you’ll have two main options to consider—PNG and JPEG.
- PNG Image Files — PNG files are larger, but they support a wide range of colors. PNGs are also the only image file format that works with transparent backgrounds on a website. If you’re editing a photo multiple times, it’s in your best interest to export it as a PNG before uploading it to your website.
- JPEG Image Files — JPEGs provide a good balance between quality and file size. This is the most common file format of digital cameras. JPEGs should work for the vast majority of images on your site, especially since the file format is smaller than a PNG.
Overall, PNGs work well for images that don’t have a ton of color. If an image has lots of lines, icons, or sharpness, PNG will be a better option as well. JPEG compression could create some contrast issues in this scenario.
A top benefit of using JPEG files is that you’ll be able to choose the quality of the image before running it through a compression tool.
Here’s an example using Preview, the default image viewer on a Mac:
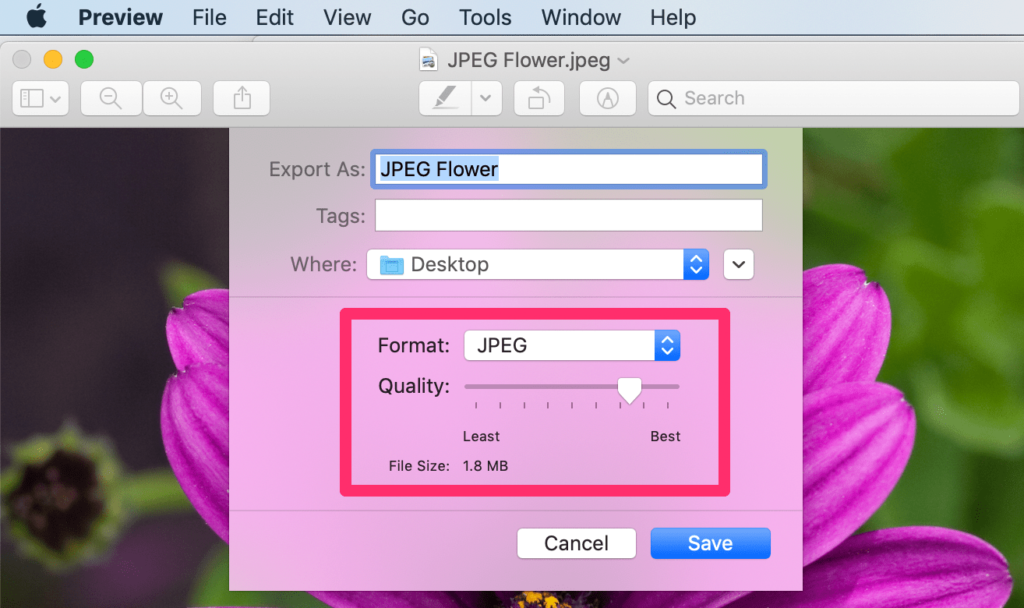
If you export images as a JPEG file, you can adjust the quality by simply sliding the bar. By reducing the image quality, you’ll simultaneously reduce the file size.
Unless you’re a professional photographer, JPEG quality around 40% to 50% should be fine for most of you. For example, if you’re uploading photographs to your portfolio of a client’s wedding, it’s probably in your best interest to sacrifice file size for image quality.
In addition to the edits and choosing the right file format, you’ll also need to prepare the correct image dimensions before proceeding to the next step.
Think about where and how the image will be used on your website. For example, the dimensions of an image used within a blog post will likely be different from an image icon on a product page.
If the content area on your blog is 700 pixels wide, the dimensions for an image here should never be larger than 700 pixels.
Any time you’re resizing an image, make sure you enable the option to scale the height and width proportionately. Otherwise, the image will get distorted.
Here’s an example of a JPEG that was 2634 x 2718 pixels and 1.8 MB:
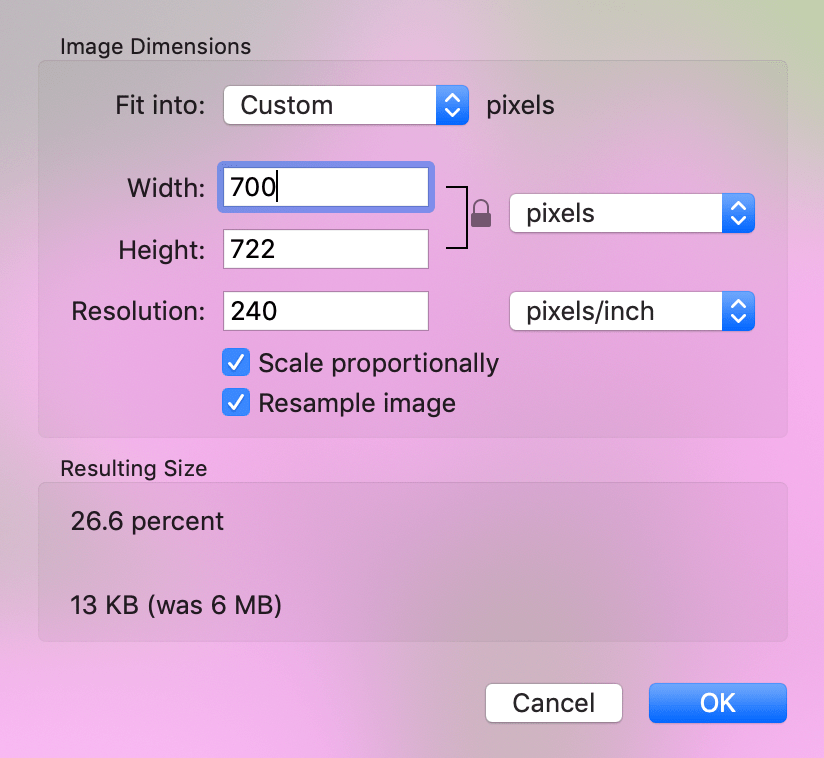
By changing the width to 700 pixels, the height automatically scaled to 722 pixels. This also reduces the file size.
Once you’ve saved the image with the right file format and dimensions, you can continue to the next step.
#2 – Run the Image Through a Compression Tool
Now it’s time for the image to get compressed. The easiest way to compress images is by using an online tool.
There are countless options to choose from. But for our purposes here today, we’re going to use TinyPNG.
Thousands of companies worldwide rely on TinyPNG for image compression. This includes big brands like Samsung, Walmart, Sony, Lego, and Bank of America. As previously mentioned, you can use this TinyPNG for free to optimize images for your website.
Start by navigating to the TinyPNG homepage. From here, you can simply drag and drop your image file into the box at the top of the screen.
The tool will automatically compress any image files that you upload without any extra steps or actions required on your end. Once the process is complete, just click the download button to retrieve your newly compressed image.
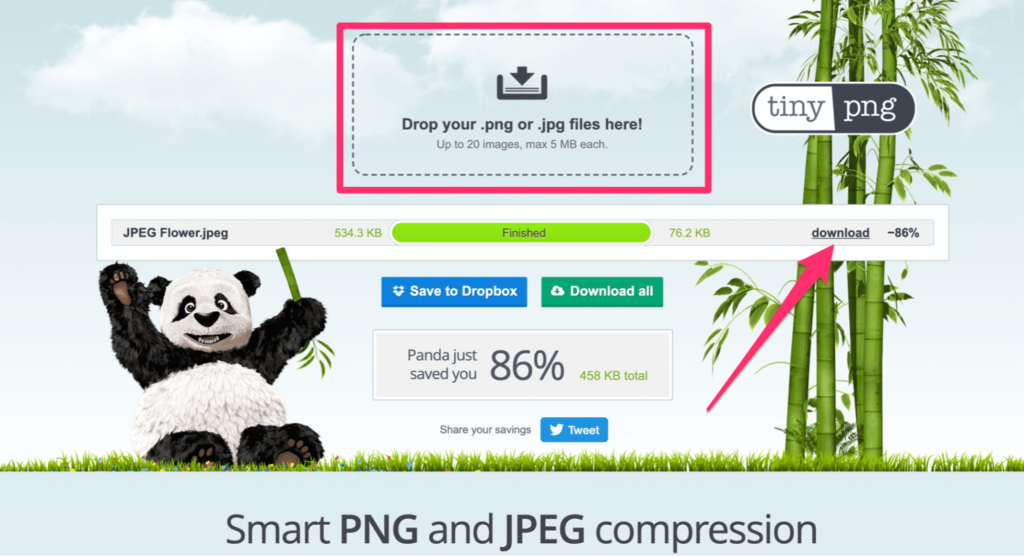
In the example above, TinyPNG took a JPEG file that was 534 KB and compressed it by 86%, reducing the file size to just 76 KB.
The original image that we started with prior to step one was a whopping 6 MB! This is a file that would be too large to compress using TinyPNG’s free service.
But after taking the time to save it as JPEG, adjust the quality, and change the dimensions, it set us up for success with the compression.
Now, let’s pretend we just changed the quality of the initial JPEG without adjusting the dimensions. If you refer back to step one, you’ll see this reduced the file size to 1.8 MB (still significantly less than 6 MB).
If we run that file through TinyPNG, it gets compressed to 446 KB—nearly six times larger than our 76 KB file that we changed the dimensions for.
That’s why the preparation in the first step is so important. If you jump straight to the compression tool, you’re still leaving a lot on the table in terms of how much you can optimize the image.
The reason why we recommend TinyPNG so highly is because the difference in image quality is unnoticeable to the naked eye. Take a look at this example comparing two transparent PNGs before and after compression:
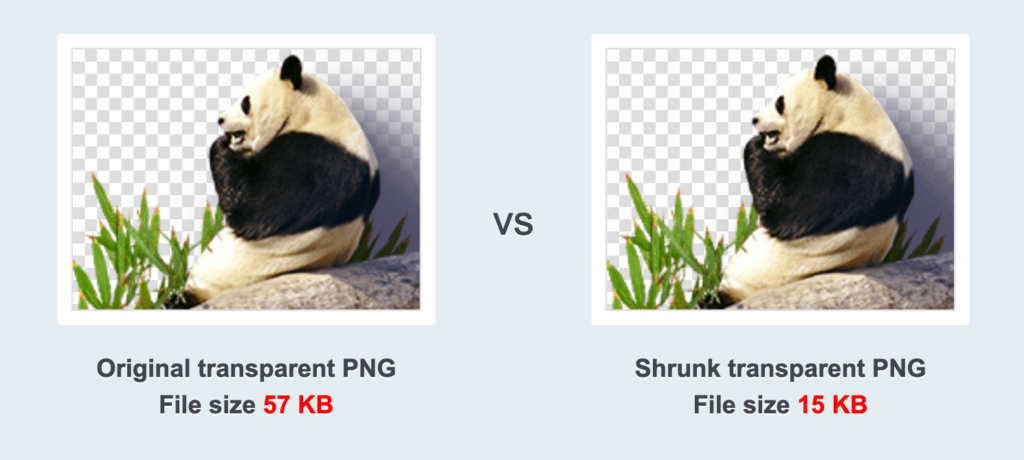
Do you notice any difference? Didn’t think so.
#3 – Upload the Image to Your Website
This step will look a little different for everyone. It all depends on the CMS that you’re using to power your website.
WordPress users will have a different interface than Magento, Shopify, Drupal, Joomla, BigCommerce, etc. Since WordPress is the world’s most popular CMS, and that’s what we use to run our site here at Crazy Egg, we’ll use it as the example for this step.
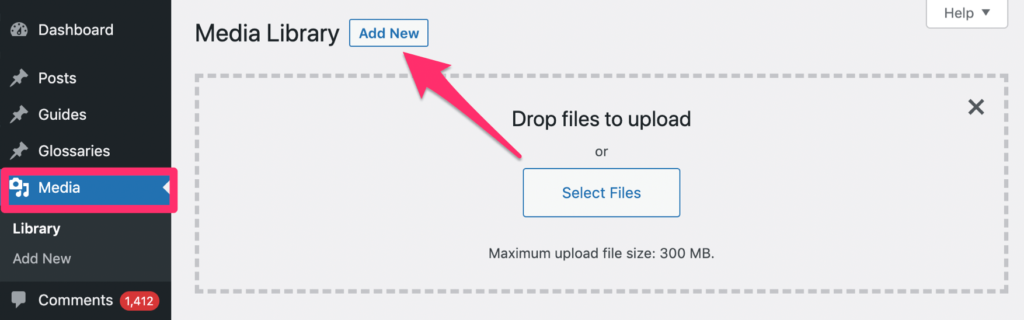
Navigate to Media on the left side of your WordPress dashboard. Then select Add New and either drag-and-drop the image or select a file from your computer.
Once an image has been added to your WordPress media library, it’s easy to insert it into blog posts or landing pages on your site. Alternatively, you can complete this process in real-time as you’re creating new content on your site.
For example, let’s say you’re writing a new blog post on WordPress. Writing the text then coming back and inserting images later may not work well for your process.
Since the image optimization process just takes a minute or two, you can go through the first two steps any time you reach a point in your blog post that calls for an image.
Then just click the Add Media button on the post and upload the image without leaving the blog.
If you feel like navigating away from the post to take care of the image optimization distracts your writing workflow, that’s ok. Just don’t forget to add the images when you finish writing.
#4 – Host Your Images on a CDN
Remember why we’re optimizing images in the first place—we’re trying to improve page loading speed.
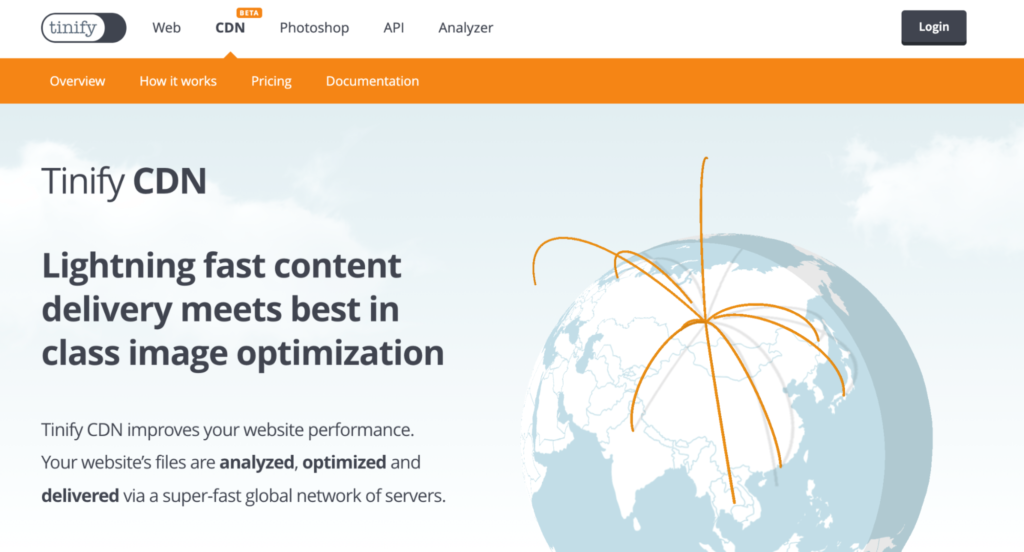
In addition to the image optimization itself, you can take this concept one step further by hosting your optimized website images on a CDN (content delivery network).
Rather than storing the images on your own servers, CDNs have networks strategically placed all over the world. So website visitors will get images delivered to their screen from a server that’s closest to them, geographically speaking.
For example, let’s say your website servers are located in the United States. If a user in Europe lands on your site, the CDN can use a server that’s located closer to that specific visitor, ultimately increasing the page loading speed.
Tinify CDN is TinyPNG’s content delivery network. So if you’re using TinyPNG to optimize your images, it’s only natural to consider them as your CDN provider as well.
While a CDN doesn’t replace your web hosting service, it can take a significant load off of your servers.
Tinify CDN starts at $15 per month. But that plan really only accommodates personal websites and small blogs.
Most of you should be signing up for the Business package, at a minimum. This plan starts at $69 per month, and you can try it free for 14 days.
#5 – Use a Lazy Load Plugin (BONUS)
By now, you’ve already optimized the images for your website. And while there’s nothing you can do to optimize the image any further, there are still steps you can take to ensure your pages load as fast as possible.
Lazy loading plugins are your best option here.
The concept behind lazy loading is simple. Images that aren’t in the field of view aren’t loaded until a visitor gets closer to that part of the page.
So images at the bottom of your page won’t load at the same time as an image above the fold. This tip will significantly increase your page loading speed, especially for pages with multiple images.
Examples of popular lazy load plugins include:
For those of you who want to take your website image optimization strategy to the next level, these plugins will get the job done.
Next Steps
Now that you’ve mastered image optimization for your website, it’s time to focus on other ways to improve your website performance.
Check out our guide on the best ways to speed up your website and improve conversions. These tips go beyond basic image optimization.
You should also learn how to clear your cache in WordPress. This five-step guide is extremely helpful for WordPress beginners looking for ways to improve their site performance. It’s especially useful for websites with lots of images.