The way to install WordPress boils down to two main options:
- Following a 1-click installation from a reputable web hosting provider like Hostinger
- Going for a manual WordPress setup
Here’s an extensive guide to implementing both approaches the right way.
Best Method: Using a Good Web Host
If you sign up with a trusted web hosting provider, they all feature quick and easy 1-click WordPress installs, with the installation itself taking between 10-15 minutes (including registration). We’ve picked Hostinger to demonstrate the process of a 1-click WordPress installation, but the underlying steps should be similar to those of other web hosting providers.
Requirements before installing WordPress with Hostinger
There are two main requirements you must meet before installing WordPress as the preferred CMS to manage your site.
Web hosting provider
WordPress is an open-source and free content management system (CMS). However, it still requires either third-party web hosting (like Hostinger) or self-hosting (hosting your WordPress site on a personal server) to store your site’s files so users can access them on the internet. In this guide, we’ll consider the third-party hosting method using Hostinger as an example.
For best performance, Hostinger recommends signing up for a hosting provider that supports the following programming languages and online database systems:
- PHP version 7.4 and above
- MySQL version 5.7 and above or MariaDB version 10.4 and above
- HTTPS support
Domain name
A domain name is a unique text identifier that lets people find and visit your site once it goes live. It’s the online equivalent of a real-world house address. You can buy a new domain name via a domain registrar such as GoDaddy, Namecheap, or Cloudflare, or get one for free or at a large discount bundled together with your hosting plan from Hostinger.
For this example, we’ll be using one of Hostinger’s managed web hosting plans, which includes a heavily discounted one-year domain registration (85% off) plus a WHOIS privacy protection to safekeep your personal information against unwarranted attacks.
Step-by-step breakdown of how to install WordPress
With Hostinger, there are two methods to install WordPress:
- Using Hostinger’s WordPress onboarding flow
- Using a 1-click WordPress install through Hostinger’s hPanel dashboard
Here’s a detailed breakdown of both WordPress installation processes.
How to install WordPress with Hostinger’s WordPress onboarding flow
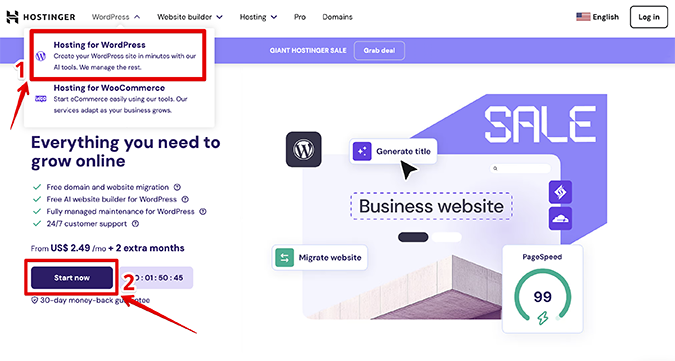
1. Go to Hostinger.com, click WordPress in the top left-hand side, and choose Hosting for WordPress from the drop-down menu. Then, click Start now in the bottom left corner.
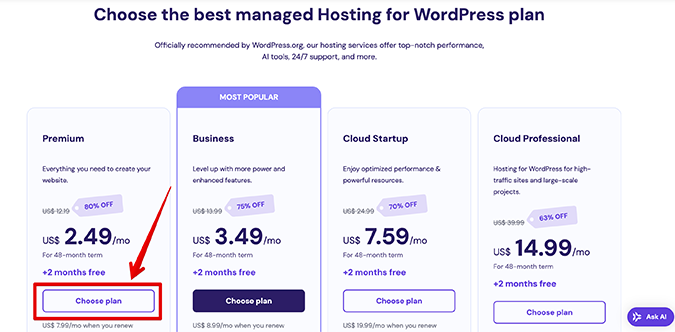
2. Choose your preferred hosting plan. We’ve chosen the premium plan as an example, but you can choose either one depending on your site’s present and future needs. Then, click Choose plan.
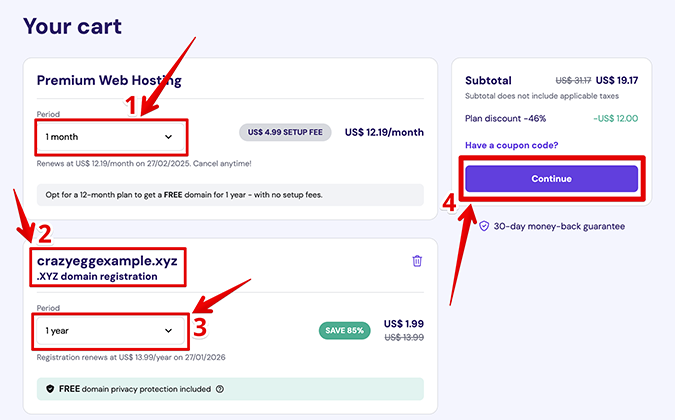
3. Choose the hosting period (1 month, 12 months, 24 months, or 48 months), enter your preferred domain name, choose the domain registration period (1 year, 2 years, or 3 years), and click Continue.
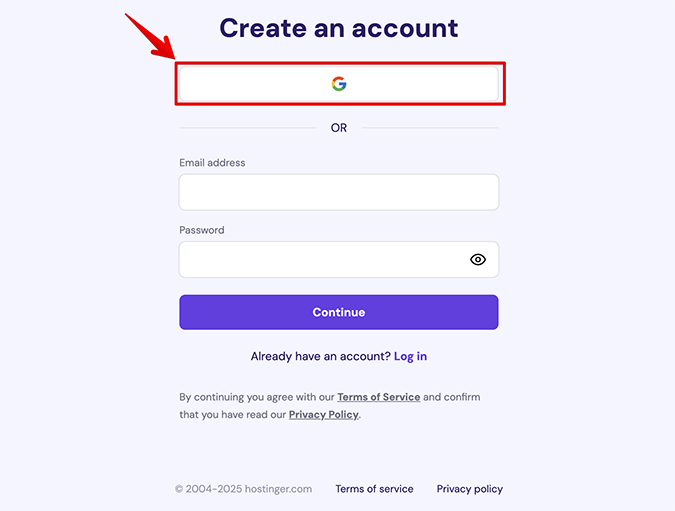
4. Create your Hostinger account. We’ll be using our Gmail account to expedite the registration process.
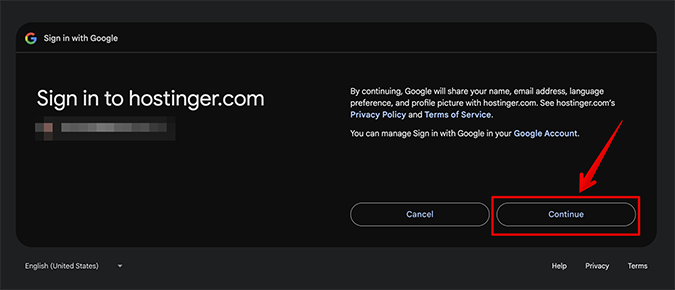
5. Choose your Gmail account and click Continue.
6. Enter your billing address and click Continue.

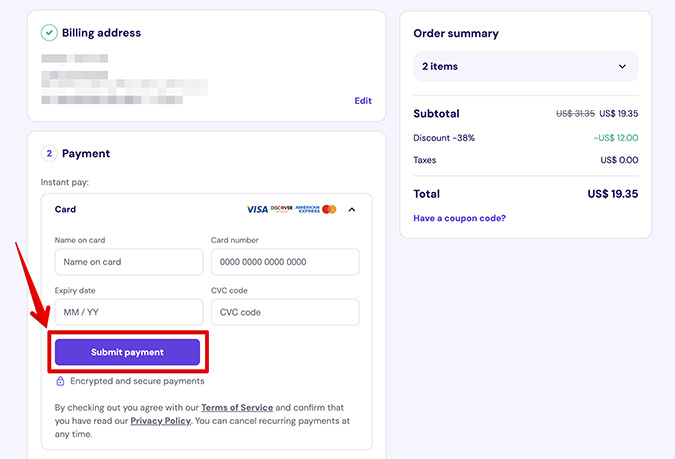
7. Choose your preferred payment method, enter your payment information, and click Submit Payment.
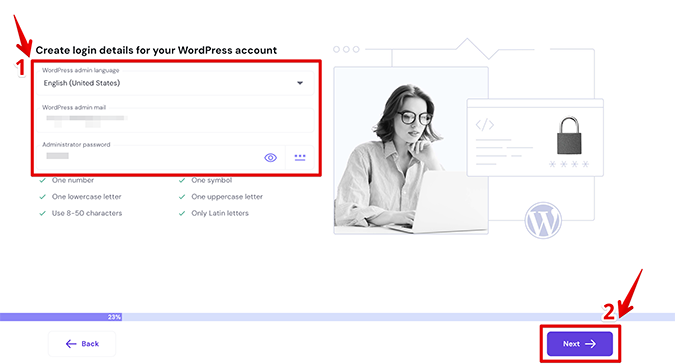
8. Choose a WordPress admin email and password, and click Next.
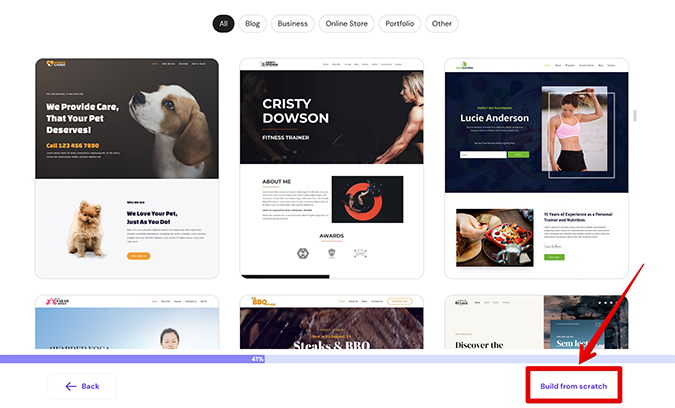
9. Select a WordPress theme, or click Build from scratch. Both options work just as well, but we’re going to opt for the Build from scratch option to start with a clean slate.
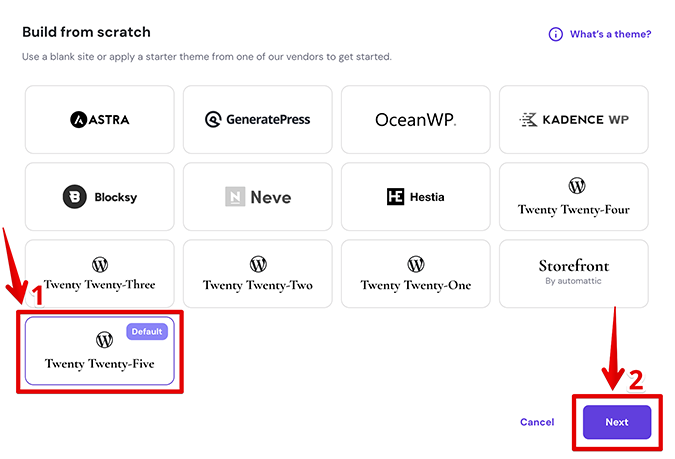
10. Select the default WordPress theme (Twenty Twenty-Three), and click Next.
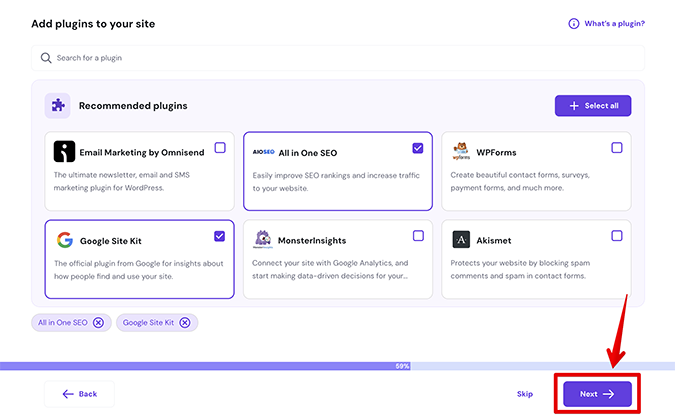
11. Select your favorite WordPress plugins, and click Next.
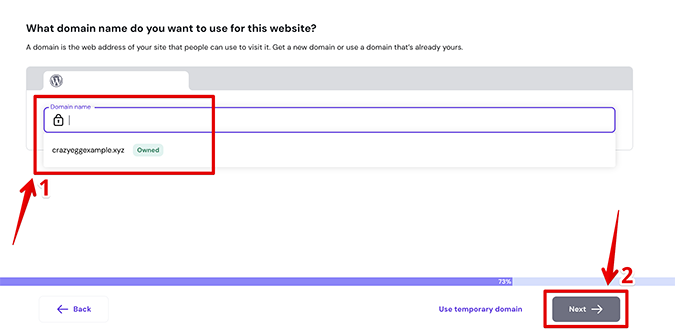
12. Select your domain, and click Next. If you don’t have a registered domain, you can also use a temporary domain to set up your site before it goes live.
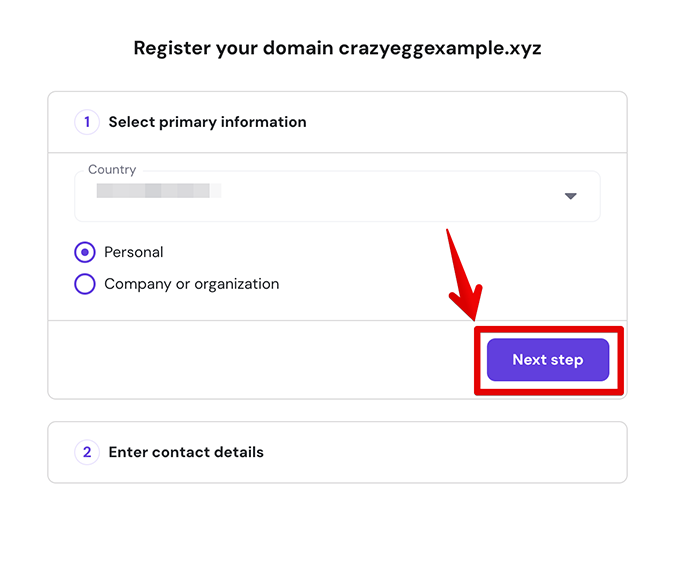
13. Select your primary information, and click Next step.
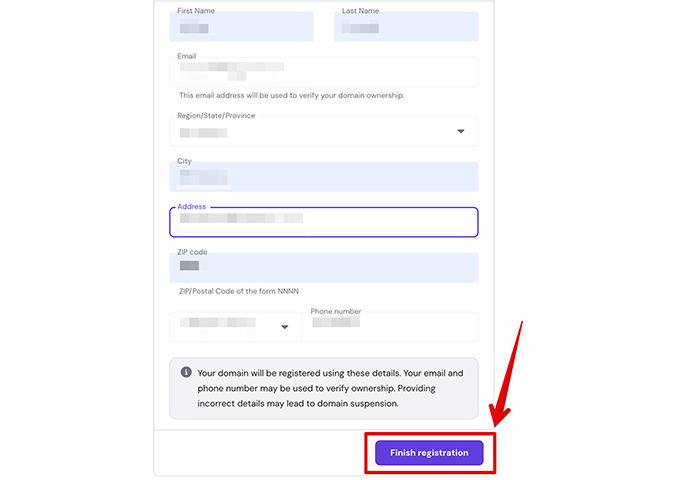
14. Enter your contact details again, and click Finish registration. Make sure there are no typos or incorrect information since a failed domain verification process can lead to a suspension of your domain.
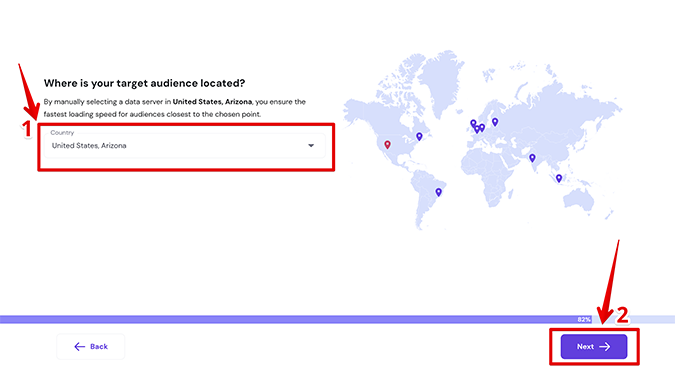
15. Select your target audience location and click Next.
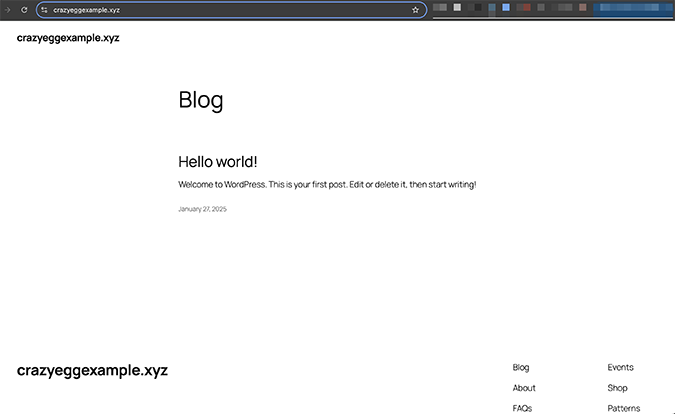
16. That’s it! Your website should be live in up to 24 hours.

How to 1-click install WordPress with Hostinger’s hPanel dashboard
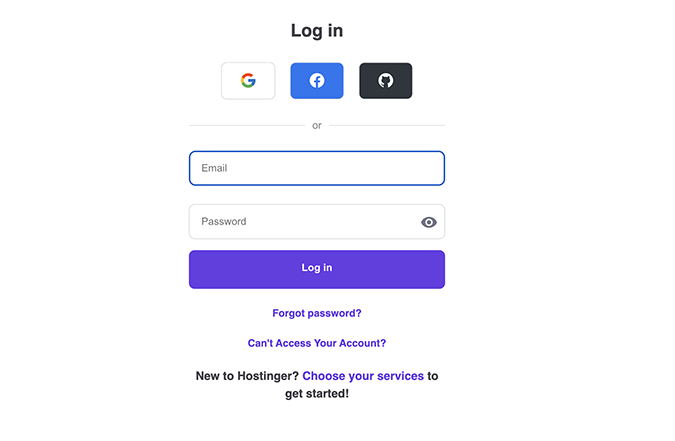
1. Go to Hostinger.com and log in to your account. If you don’t have an account, create one and purchase a new domain and hosting plan.
2. [Optional] Hostinger is both a registrar where you can purchase a new domain and a hosting provider where you can host your website.
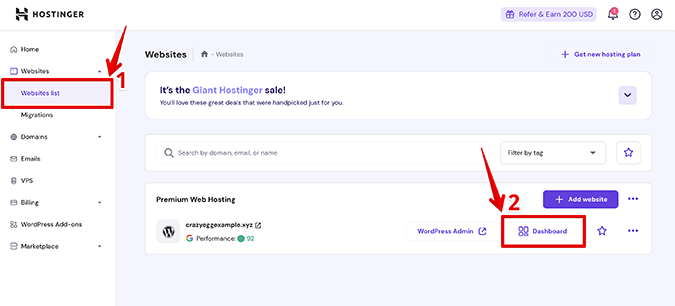
You can also host an existing domain purchased from a different registrar on Hostinger, but you have to connect Hostinger’s DNS/nameservers to that registrar. To find Hostinger’s nameservers, go to Websites, Websites List, and click Dashboard on the right-hand side.
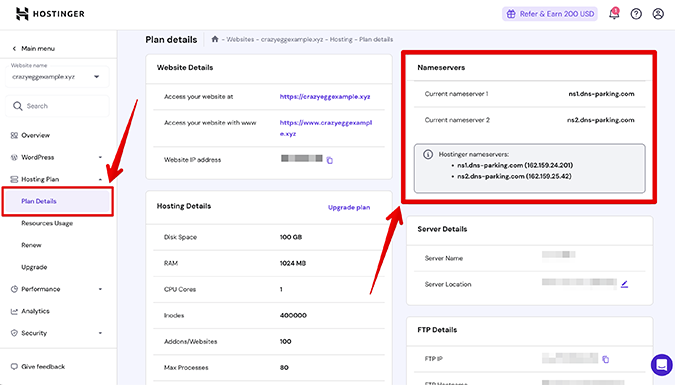
3. [Optional] From here, go to Hosting Plan, Plan Details. You should see Hostinger’s nameservers on the right-hand side.
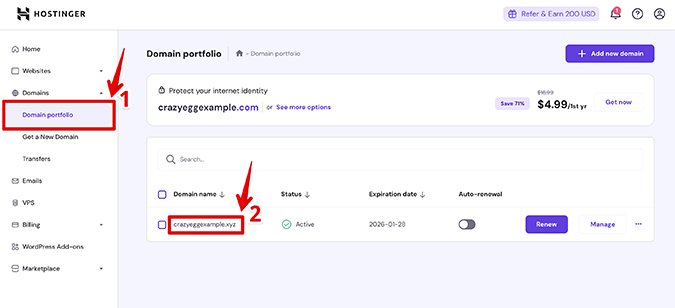
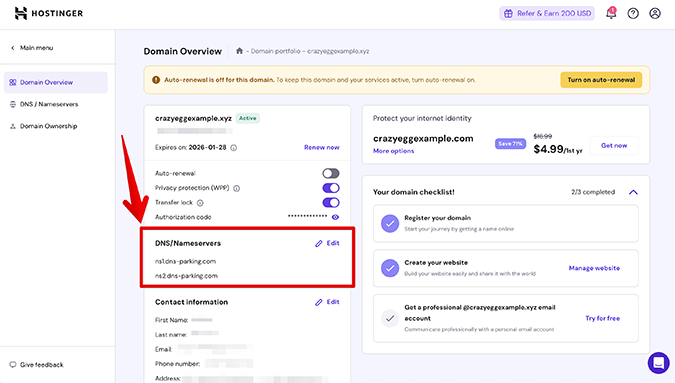
4. [Optional] You can also host a domain purchased on Hostinger on a different web hosting platform. To do this, go to Domains, Domain Portfolio, then click your domain under Domain name on the right-hand side.
This area lets you edit your Hostinger nameservers to point to a different hosting provider or to connect your Hostinger account with a domain purchased from a different registrar such as Namecheap or GoDaddy.
If both your domain and web hosting are on Hostinger, skip steps 2, 3, and 4. Otherwise, go to your registrar’s settings and enter Hostinger’s nameservers in place of that registrar’s default nameservers. It can take up to 48 hours for the change to take place.
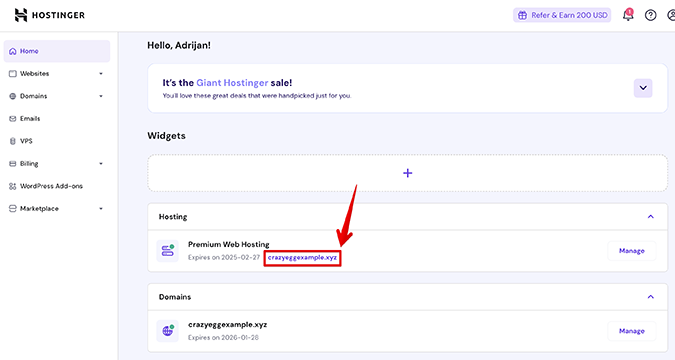
5. Once you’re logged in, make sure you’re in the Home area of hPanel. Then, click your domain from the Hosting card on the right-hand side.
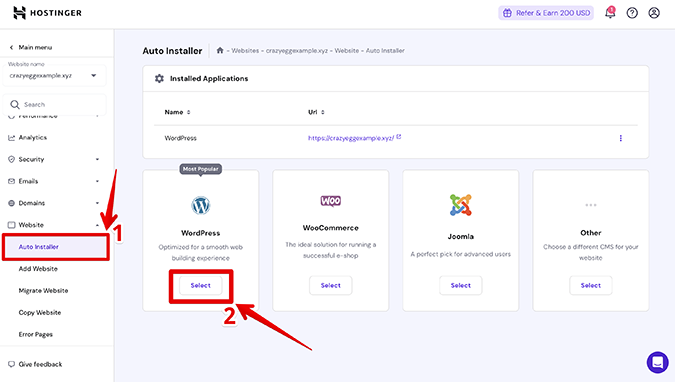
6. Navigate to Website, Auto Installer, and select the WordPress 1-click installation by clicking Select.
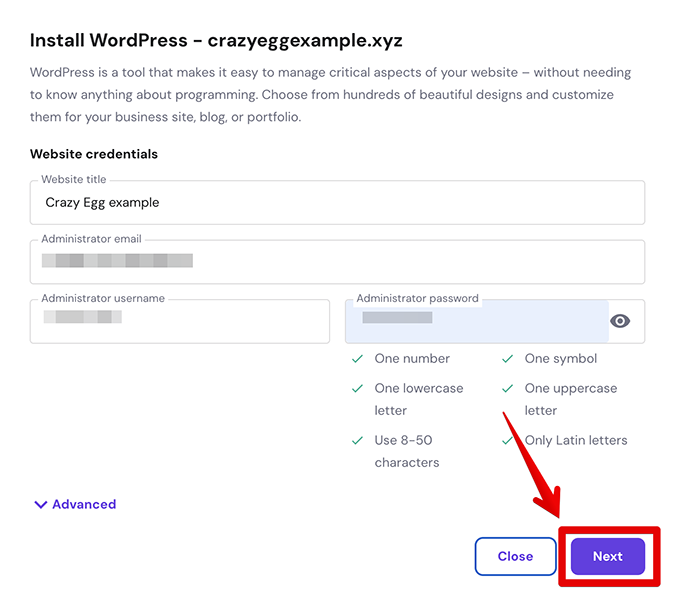
7. Enter your website credentials, including your preferred site title, email address, username, and password for later access to the WordPress dashboard. Click Next.
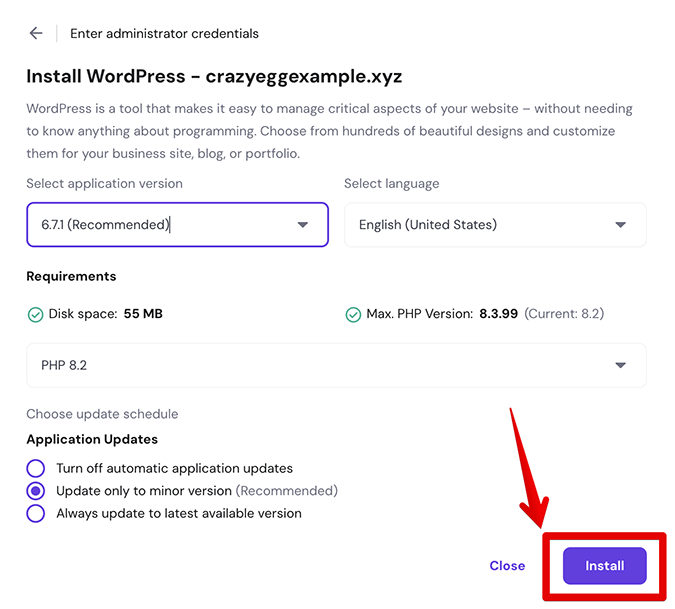
8. Select your website preferences, including WordPress version, website language, and update schedule. Hostinger recommends updating only to a minor WordPress version by default. Click Install.
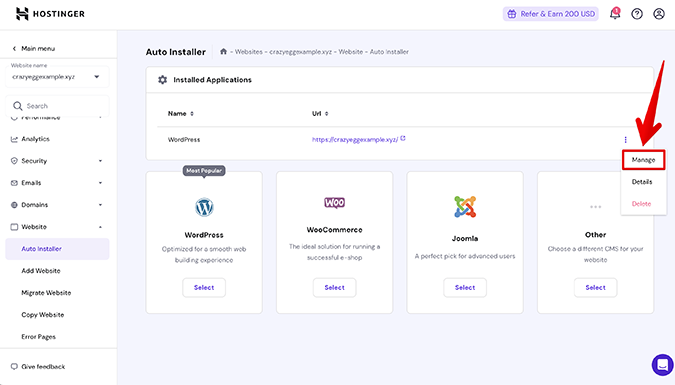
9. Once completed, your installed WordPress website will appear under Installed Applications in the Website, Auto Installer area. Click on the three dots at the right of your WordPress URL and select Manage to open the hosting dashboard area.
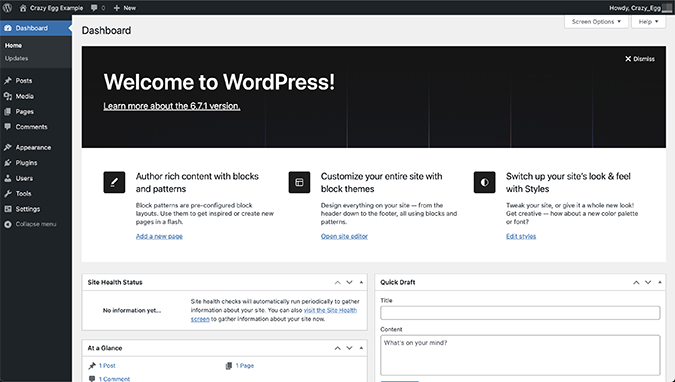
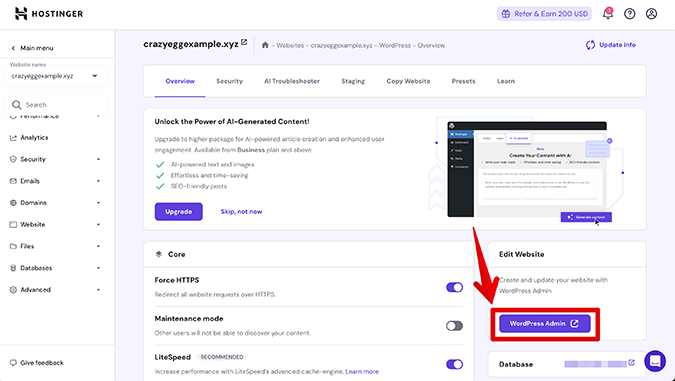
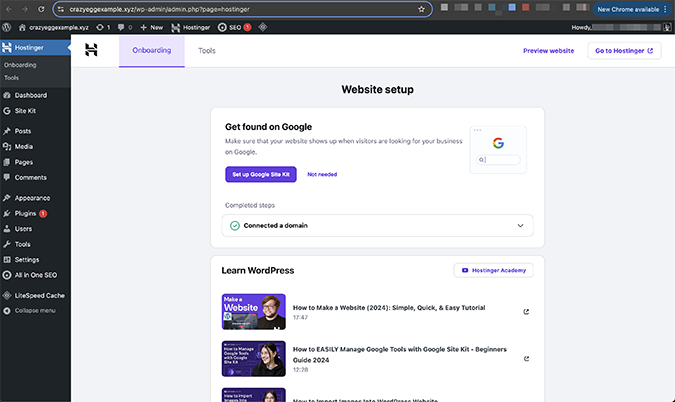
10. Click WordPress Admin to access your new site’s WordPress administrator dashboard.
Congratulations, your new Hostinger-hosted WordPress site should be live in up to 24 hours!
Second Method: Install WordPress Manually
Finally, you can install WordPress manually. In this demonstration, we’ve opted to use Hostinger’s services, including their hPanel file manager and web hosting plan to upload WordPress to our example site.
Your steps may differ if you’re using a different hosting provider, registrar, and FTP client, but the general installation methodology remains the same.
Requirements before installing WordPress manually
There are several requirements you must meet before installing WordPress manually.
Hosting plan
If you want your website to go live shortly after installing WordPress, you’ll need to purchase a hosting plan to store your site’s files and data. For this demonstration, we’re going to use Hostinger’s premium hosting plan.
Additionally, you can also install WordPress locally on your computer to test themes, plugins, and designs without interfering with the live website, or host your site on a local server.
Domain name
Hostinger makes it easy to register a new domain name while picking your preferred hosting plan. We’re going to use our example domain name (crazyeggexample.xyz) that we’ve also purchased from Hostinger.
If your domain exists on a different registrar, you’ll need to change its nameservers to point to your hosting provider. Here’s how to do that in Namecheap and GoDaddy.
WordPress installation tools
You’ll also need additional tools to ensure a seamless manual installation, including:
- The latest WordPress package from WordPress.org
- An FTP client or a file manager to upload WordPress core files to the server
- A code editor to edit WordPress core files such as BBEdit or VS Code
How to install WordPress manually
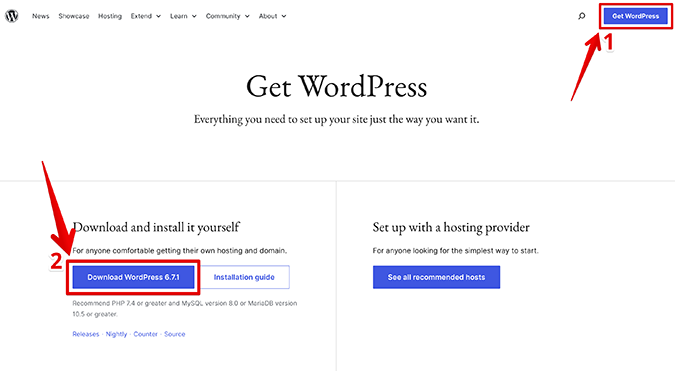
1. Go to WordPress.org, click Get WordPress, then click Download WordPress to get the latest version.
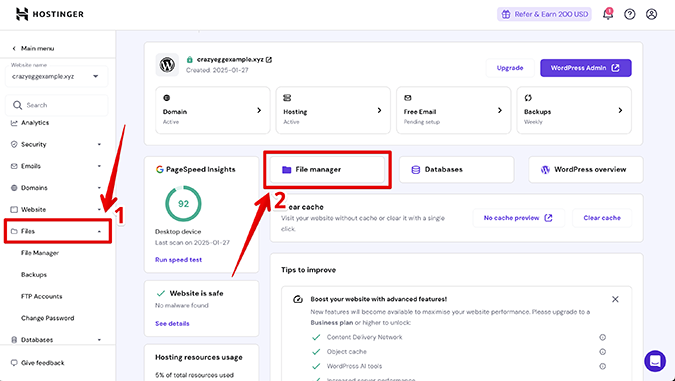
2. Log in to your Hostinger account, go to hPanel, then navigate to Files and click File Manager.
3. Open the public_html folder and use drag and drop to upload the WordPress ZIP file.
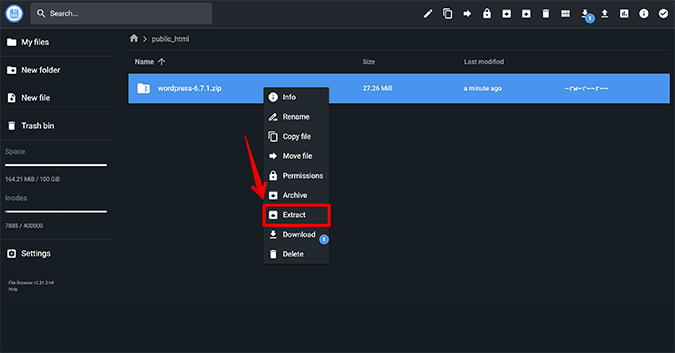
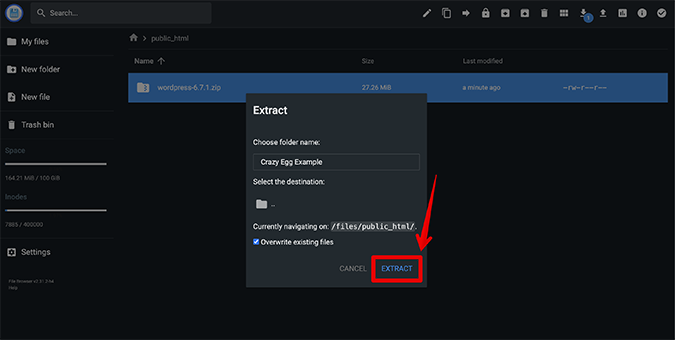
4. Name your folder and click Extract.
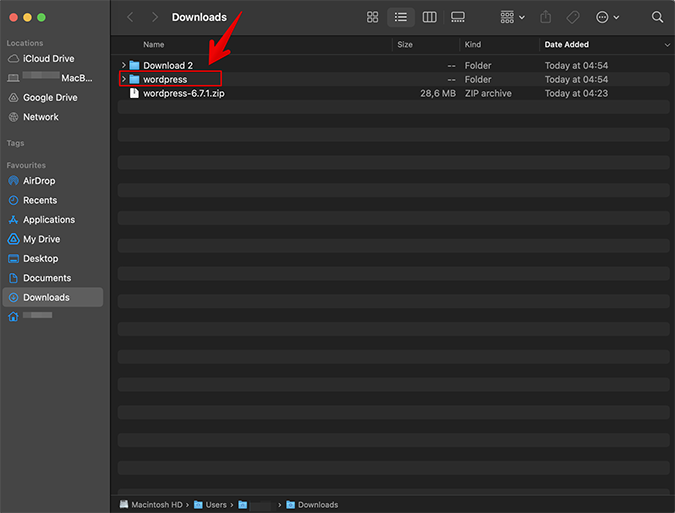
5. [Pptional] To upload files to your web server using an FTP client, download and extract the WordPress package on your local drive.
Note: This is an alternative method of uploading WordPress to your web hosting provider. If you’ve already completed uploading and extracting your WordPress package through Hostinger’s file manager in hPanel, skip steps 5, 6, and 7.
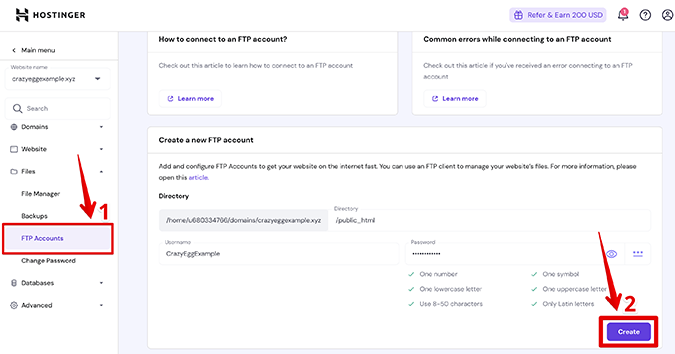
6. [Optional] From hPanel, go to Files, FTP Accounts. Enter a new username and password to create a new FTP account and click Create.
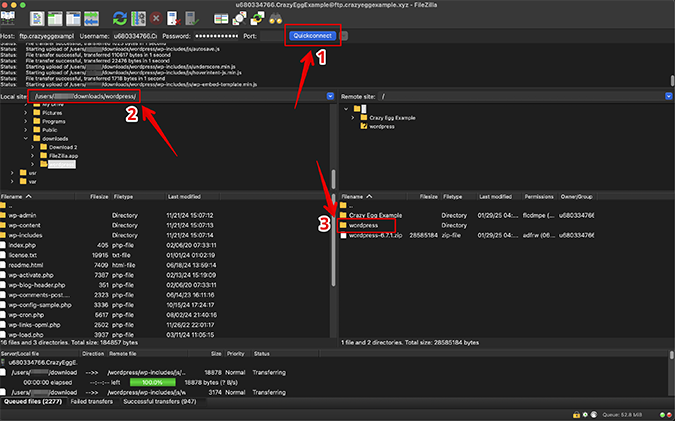
7. [Optional] Launch an FTP client (we’re using FileZilla) and connect to your FTP server using your web hosting provider’s details. Go to Files, FTP Accounts to get Hostinger’s FTP details.
Enter your web credentials in FileZilla and click Quickconnect to connect to your web host.
Enter the location of your extracted WordPress directory next to Local site.
Drag and drop your WordPress files or folders from left to right to upload them to your web host.
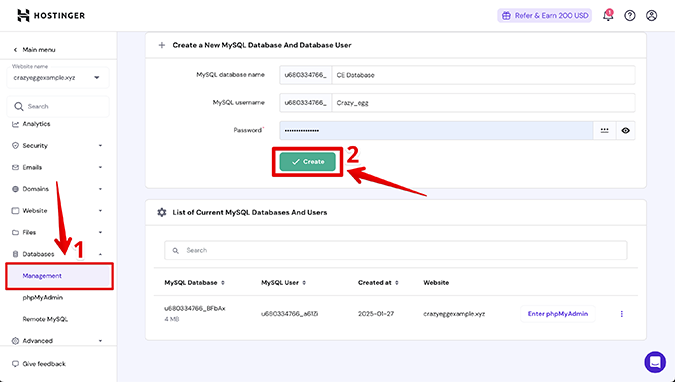
8. It’s time to create a MySQL database and database user. A database is an essential part of all websites, allowing webmasters to safely store user data, site settings, and new content such as articles and pages.
Navigate to Databases, Management in hPanel.
Enter your new database name, MySQL username, and password.
Click Create to create your new MySQL database and save your credentials for later use.
9. It’s time to connect your database credentials to wp-config.php, a core WordPress file that contains essential information about your site.
Access your site’s root directory via Hostinger’s file manager or with an FTP client like FileZilla.
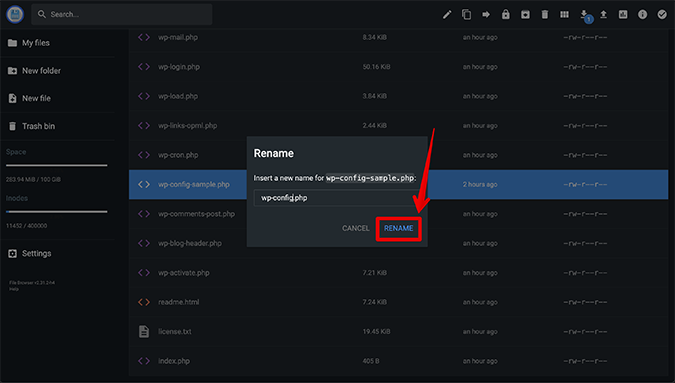
Locate the wp-config-sample.php file and right click it to rename it to wp-config.php.
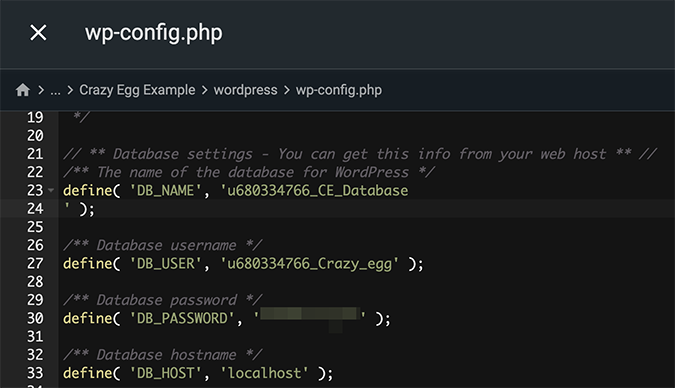
10. Right click the renamed wp-config.php file and click Edit. Locate the code snippet that contains DB_NAME, DB_USER, and DB_PASSWORD.

11. Replace the database_name_here, username_here, and password_here fields with your newly created MySQL credentials. Click the Save icon in the top right-hand corner.
12. Once all requirements are done, you are finally ready to start your manual WordPress installation.
Open an empty browser window and enter your_domain.tld/wp-admin/install.php or your_domain.tld/subdirectory_name/wp-admin/install.php in the URL address bar.
Click in the URL address bar and press Enter.
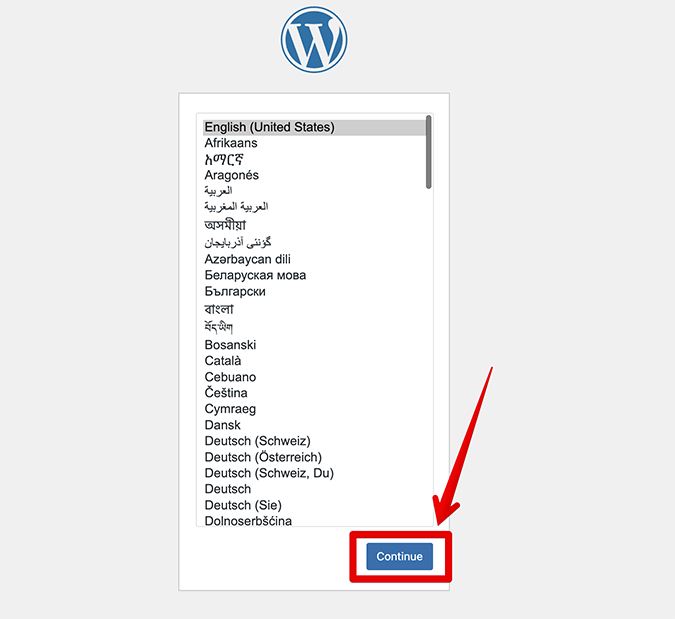
Choose your language and click Continue.
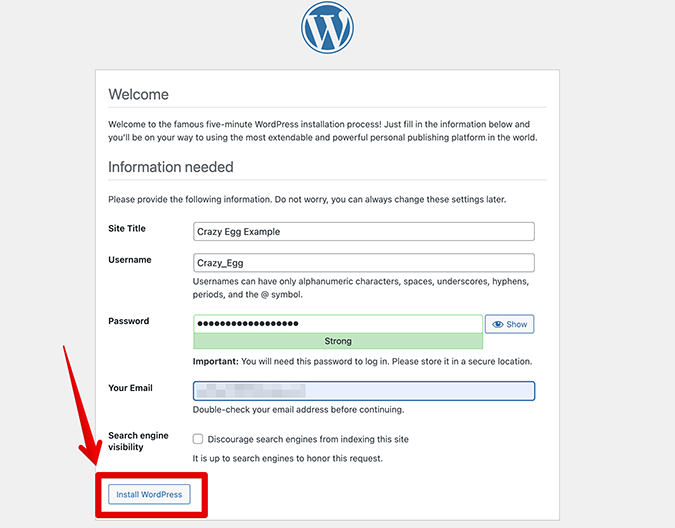
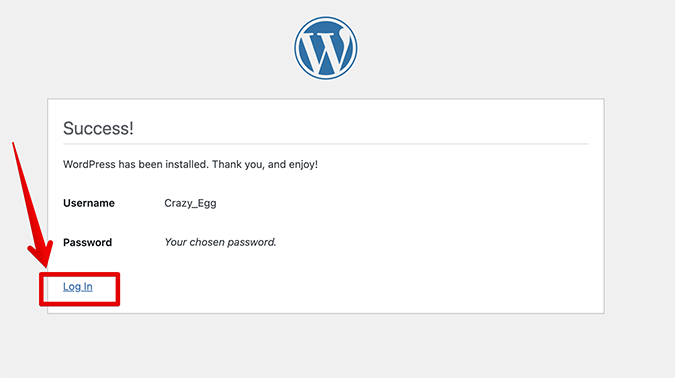
13. Enter your site title, and set your username, password, and email account. Don’t check the box next to Search engine visibility, since there’s no reason to prevent search engines and people from discovering and visiting your website. Save your site credentials for later.
14. Click Log in to access your site’s WordPress dashboard.
15. Enter your credentials and click Log in.
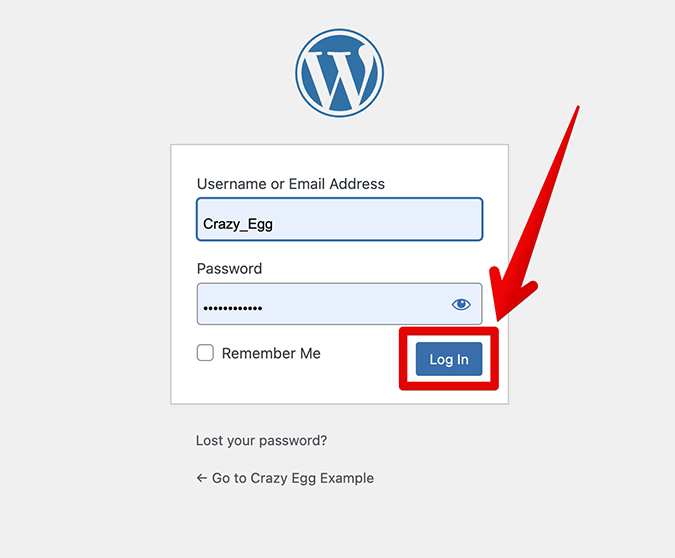
16. That’s it! You’ve successfully managed to perform a manual WordPress installation.