If you’re new to WordPress, you might be a bit hesitant about editing code on the platform for the first time. However, you might also find that it’s a lot easier than you think. In fact, there are more than a couple of ways to go about it.
These ways include:
- Via the block editor
- Via the classic editor
- Via your theme’s source code
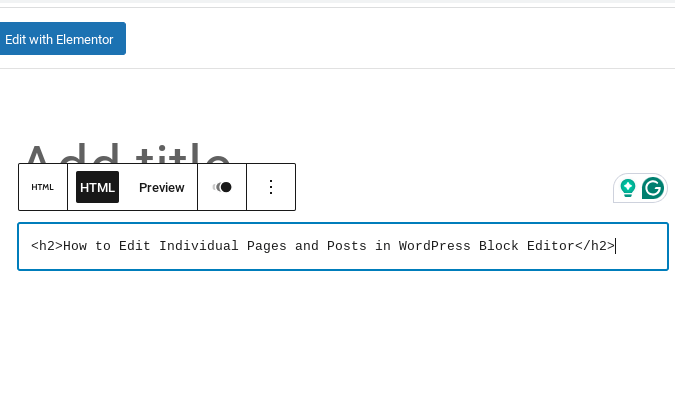
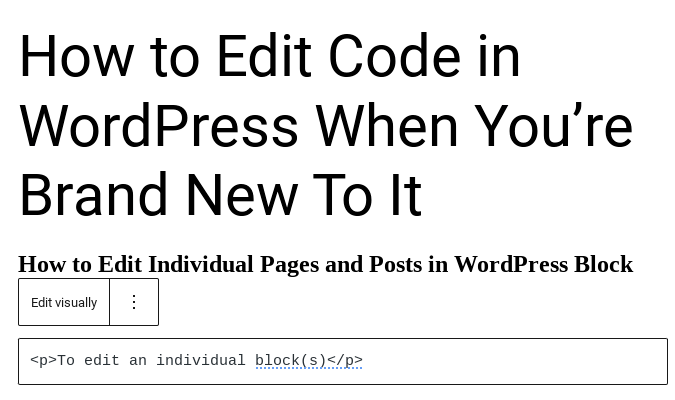
How to Edit Individual Pages and Posts in WordPress Block Editor
Knowing how to use the block editor can help you make all kinds of edits to pages and posts in WordPress. It’s generally a straightforward process that’s easy to execute.
Using the dedicated Custom HTML block
- From your WordPress application, open a new or existing page or post.
- In the block editor, click the + button in the top left corner.
- Type “Custom HTML” in the search bar and click on the associated block after it populates.
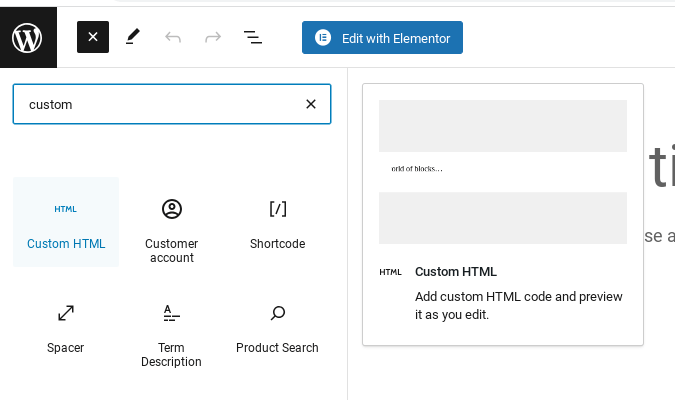
- Paste or type in the HTML code you want to use.
For example, you can type <h2>How to Edit Code in WordPress When You’re Brand New To It</h2>.
This code brackets the text with <h2> and </h2> header tags so that WordPress converts them into HTML headers on the page.
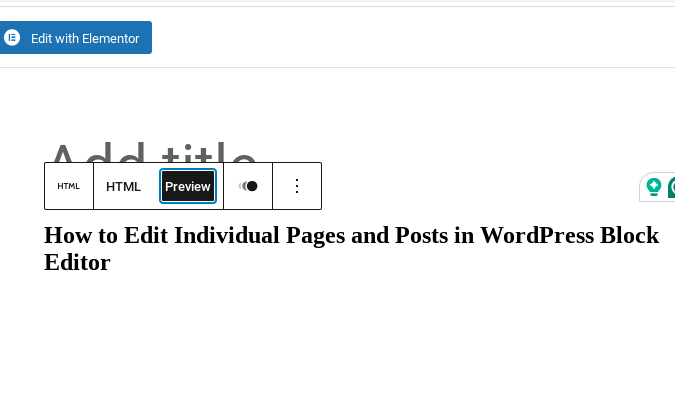
- Click the preview button to observe how the text will look when it goes live on the page.
Editing individual content elements (such as images, headings, paragraphs and lists) on a page or post
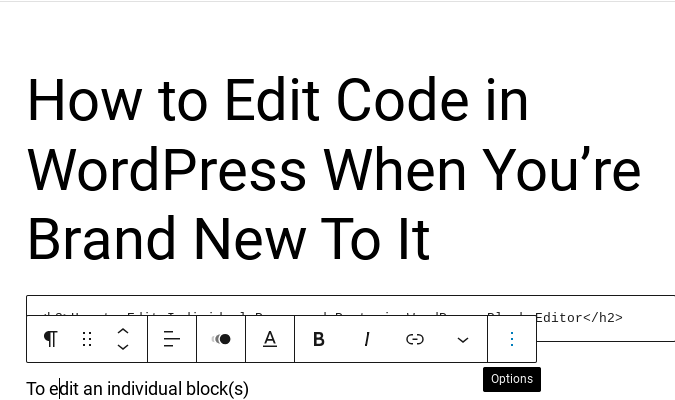
- Click on the block you want to edit.
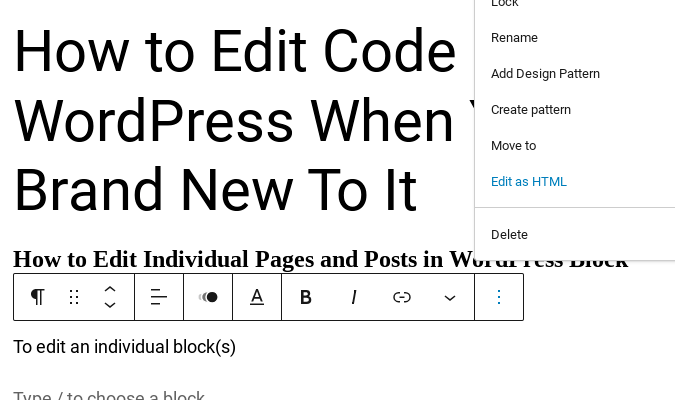
- After the toolbar appears, click the three dots on the far right to display additional options.
- Click Edit as HTML from the dropdown menu.
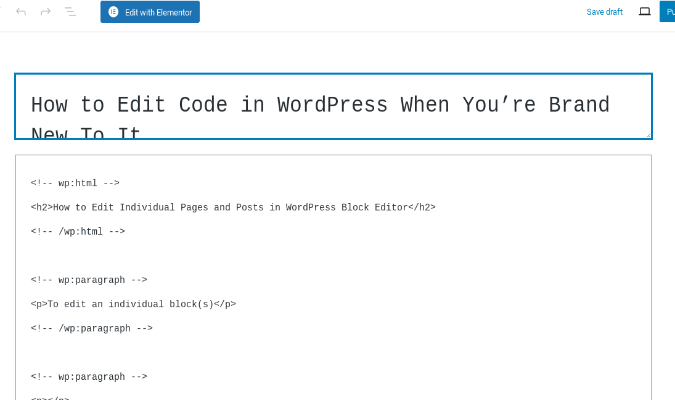
- You can then edit the code of that individual block and save your changes once you’re finished. One example change you can make is to convert your text into a paragraph block by embedding it in between <p> and </p> paragraph tags.
Editing an entire post
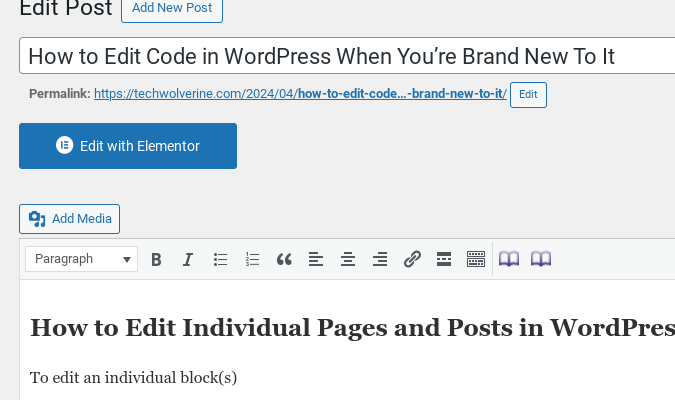
- Go to your dashboard and click Posts on the left-hand side.
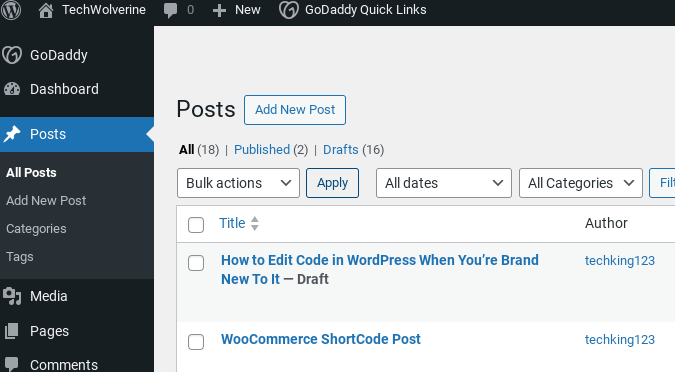
- Select the post you want to edit, then click on the three dots at the top right-hand corner next to the settings icon.
- Locate the Code Editor in the lower portion of the dialog box that appears.
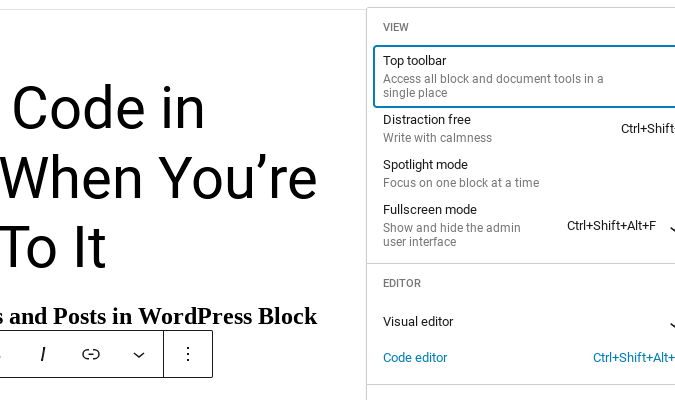
- Select Code Editor, edit the HTML to your liking, and then save it.
How to Edit Entire Posts with the Classic Editor
The current WordPress editor is known as Gutenberg. However, an older, classic editor is also available, and it’s often favored by those who prefer simplicity and a more traditional editing experience.
Since the classic editor is a WYSIWYG (what you see is what you get) editor, it resembles word processors like MS Word, which also brings a level of familiarity to users.
Activating the Classic Editor plugin
- Go to your WordPress dashboard. From the plugins option on the left bar, select Installed Plugins.
- Find the Classic Editor plugin and click Activate if inactive.
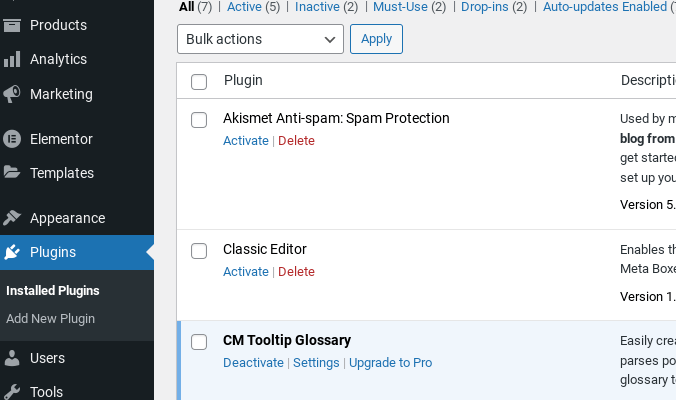
- Keep in mind that this is a toggle button, so it will turn into a Deactivate button when it is active.
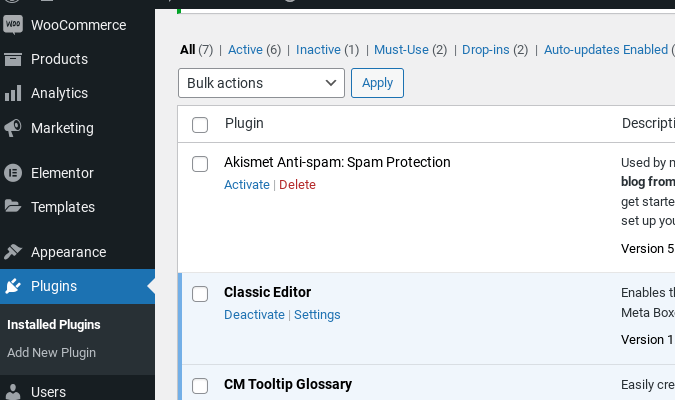
- Once active, any time you create a new page or post—or visit an existing one—you’ll encounter the Classic Editor interface in all its glory.
Using the Classic block option
The block editor allows you to use the classic WordPress editor with relative ease.
- Select the page or post you want to edit.
- Click on the + Block Inserter icon on the upper left-hand corner of the page.
- Search for the Classic editor in the search bar that appears.
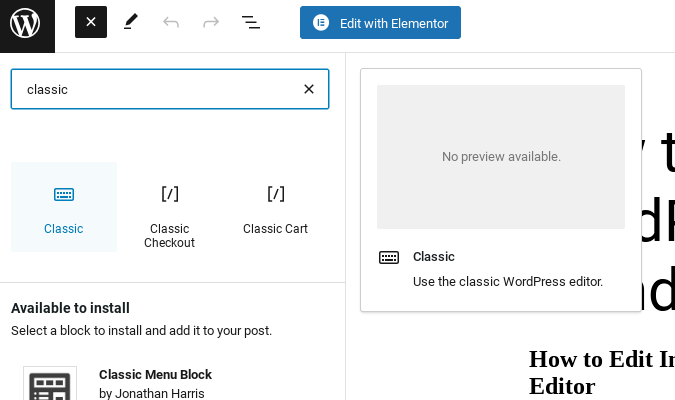
- Click on the Classic block to add it to the page or post.
- After you’ve added the block, type and edit the text as you please.
- Remember that the block toolbar will appear above the block whenever you click on it.
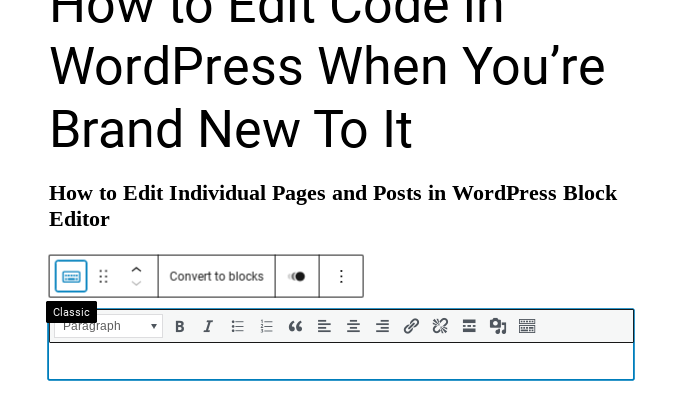
- The first row contains familiar editing buttons for bold, italics, unordered lists, ordered lists, block quotes, and more.
How to Edit Your WordPress Theme’s Source Code
First and foremost, going with this method requires caution because any mistake can be catastrophic, possibly shutting down your WordPress site and locking you out for good. Therefore, it is generally recommended to use the in-dashboard WordPress code editor unless you are an expert.
That said, the safest way to edit your theme’s source code is with a child theme. As its name suggests, a child theme is a subtheme of a main or parent theme, inheriting the style and structure of its parent.
As a copy of the parent theme, a child theme works in tandem as a safeguard, allowing you to edit a WordPress theme without directly modifying it. Consequently, if anything goes wrong with your modifications, you still have the unchanged parent theme to revert to.
In practice, you can add code customizations to the child theme, and they’ll override the code on the parent site. Remember that these changes will stick even after an update.
Creating a child theme
First of all, remember that a working understanding of PHP and HTML style sheets is immensely beneficial in this exercise.
Essentially, a child theme requires three things: a specific folder, a stylesheet, and a functions.php file.
To create a child theme, follow these steps:
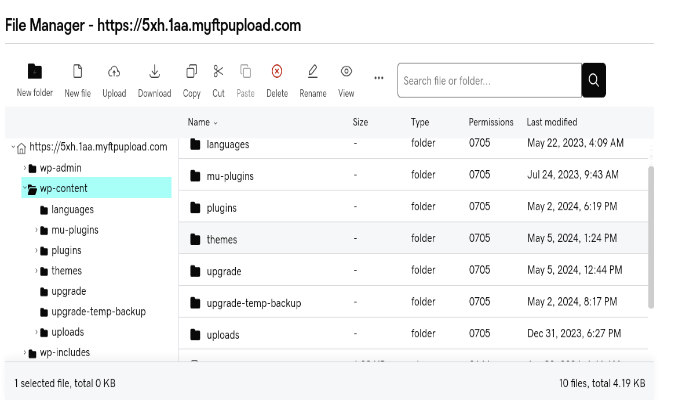
- Open your WordPress site’s cPanel or File Manager application. It’ll typically display three folders: wp-admin, wp-content, and wp-includes.
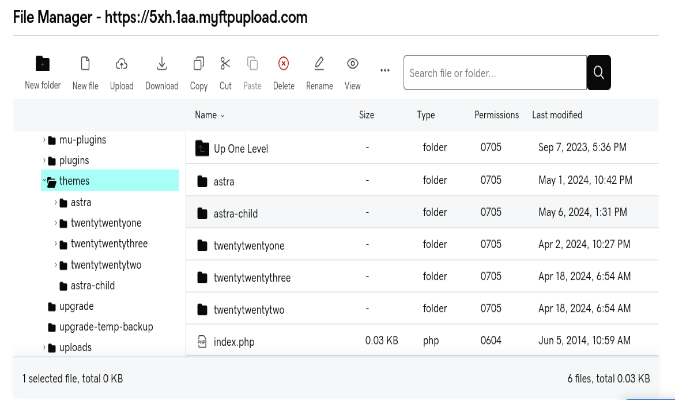
- Themes are located in the wp-content folder. Navigate through the wp-content > themes and locate the theme you wish.
- Open the themes folder.
- Create a new folder for your theme. A child theme is traditionally given the same name as its parent, only appended with the text “-child.”
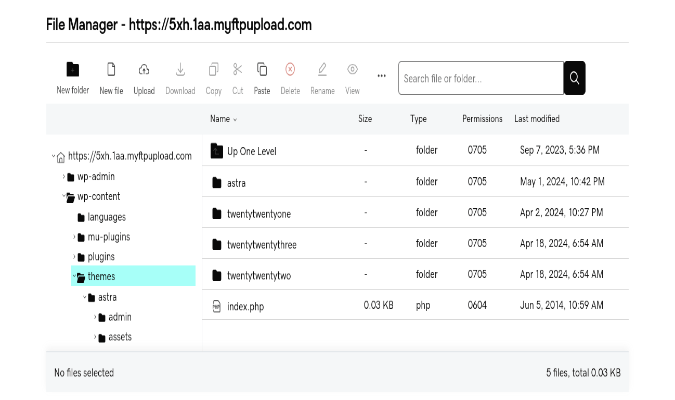
- To create and rename a new folder, use the New Folder and Rename command icons displayed on the menu bar.
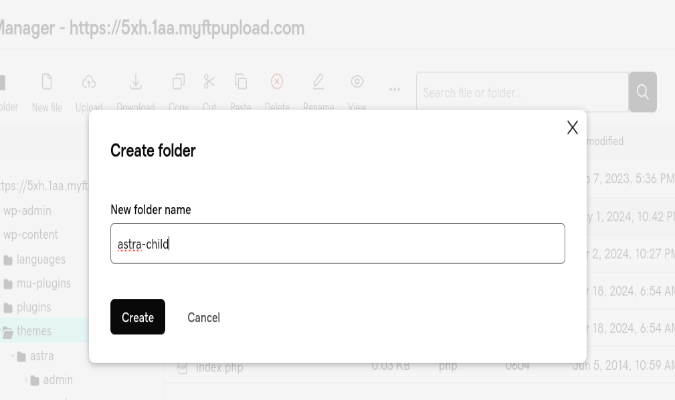
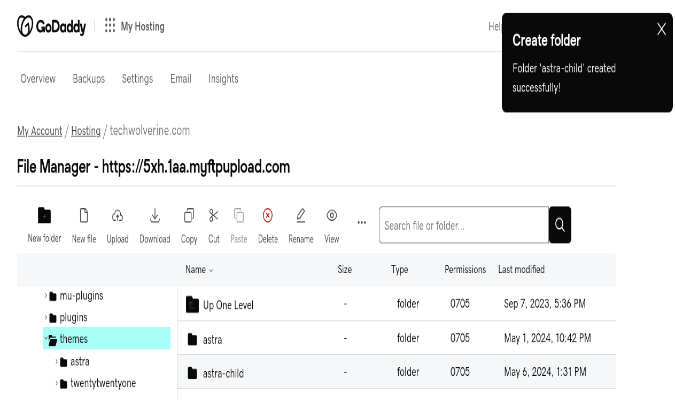
- Once you click the Create button, your new folder will populate into the file explorer-like window. WordPress will also notify you of the successful operation of the new folder, which you’ll find in the themes folder.
The next steps involve the critical elements for your newly created folder to function as a child theme.
Creating its style sheet
A style sheet allows you to code the design of a website, including those hosted and managed through WordPress. It enables you to define the style rules that dictate the behavior and appearance of an HTML page, controlling its layout and how browsers render it to end users.
While a style sheet sounds fanciful, building one is a simple process that starts with creating a text file and giving it the .CSS file extension. WordPress requires child themes to name their style sheet style.css.
- Locate your theme folder from the file manager via wp-content > themes.
- Open your child theme folder, which should be empty.
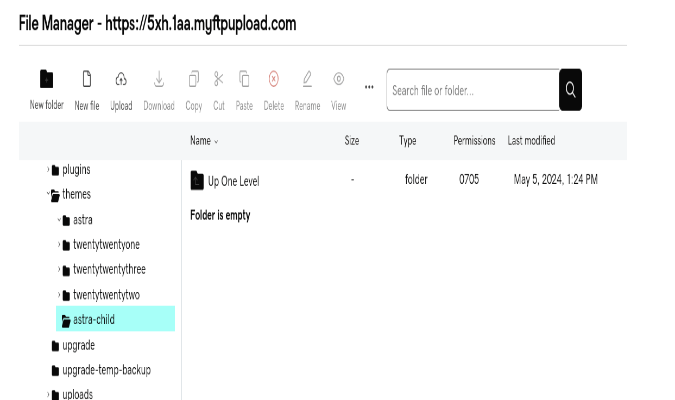
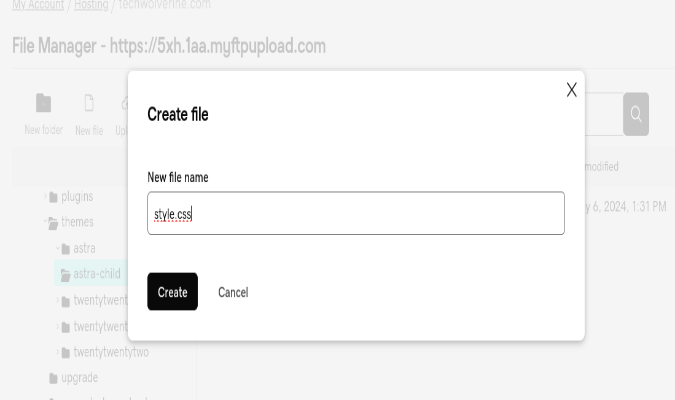
- Click on the New File icon to activate the process of creating a style sheet. When the create file dialog comes up, enter style.css as its name.
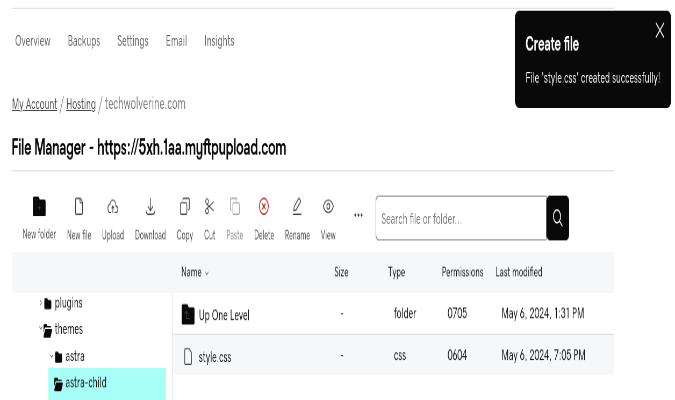
- WordPress will issue a prompt if the creation operation is successful, and you should see the newly created style.css file on display in the child folder.
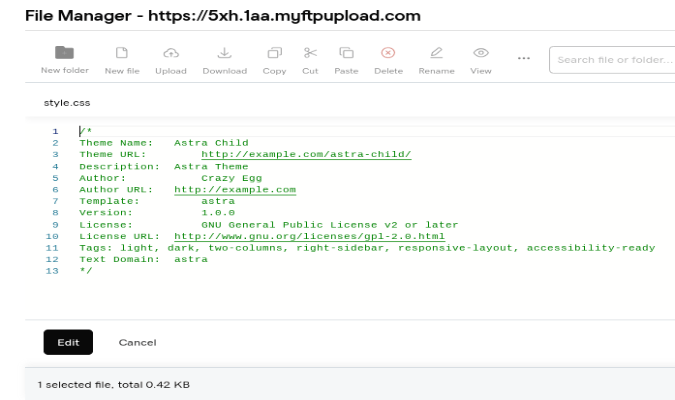
According to WordPress, you must include certain boilerplate information at the beginning of style.css if you want it to work effectively, like the following:
/*
Theme Name: Twenty Seventeen Child
Theme URL: https://example.com/twenty-seventeen-child/
Description: Twenty Seventeen Theme
Author: John Doe
Author URL: https://example.com
Template: twentyseventeen
Version: 1.0.0
License: GNU General Public License v2 or later
License URL: https://www.gnu.org/licenses/gpl-2.0.html
Tags: light, dark, two-columns, right-sidebar, responsive-layout, accessibility-ready
Text Domain: twentyseventeen
*/
Be careful about copying and pasting this boilerplate info. If the code doesn’t contain anything that reflects the parent theme you want to inherit and customize, you must change the Theme Name and Description to reflect the parent folder’s name in your style.css, indicating that this theme will be its child.
You must also ensure the Template field matches the folder name of its parent theme (relative to the wp-content/themes). This is readily apparent when dealing with certain themes.
Activate the child theme
To display your themes from the WordPress dashboard, follow these steps:
- Navigate to Themes > Appearance. Your newly created child theme should appear among the options.

- Hover over your theme and click Theme Details if necessary. Otherwise, click Activate.
Remember, although editing the child theme mitigates the risks of screwing up your website, you still need to be technically adept and thoroughly understand child themes for this kind of code editing to work. If editing your theme’s source code isn’t something you already know how to do well, it may behoove you to wait until you’re more experienced.