A dropdown menu is a graphical user interface (GUI) element on a website that reveals additional navigation options whenever a user clicks on or hovers over a menu item. Its primary purpose is to prevent clutter while keeping a website’s menus organized, accessible, and user-friendly.
To create dropdown menus for WordPress (WP), you first need to create a main navigation menu—which is typically your site’s main header menu, but it can also be a footer menu or another additional menu.
Once you’ve got that in place, there are three straightforward ways to create a dropdown menu in WordPress: via the full site editor, via the WP Admin menu, and via plugins.
How To Create Dropdown Menus in WordPress With The Full Site Editor
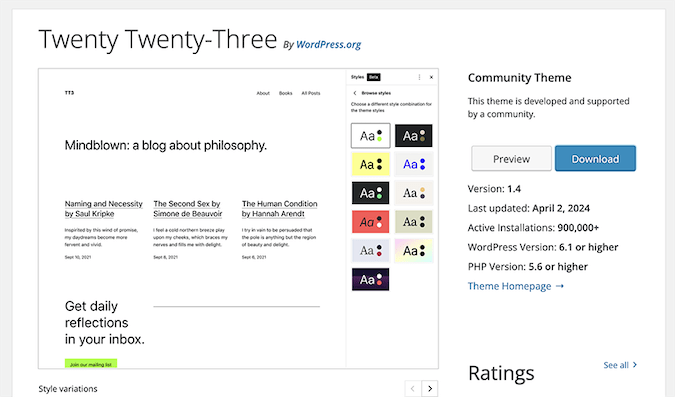
Note: This example uses a free WordPress theme called Twenty Twenty-Three, which is compatible with the latest version of WP and also supports full site editing (FSE).
First, navigate to Appearance > Editor from the left-hand side of your WordPress dashboard.
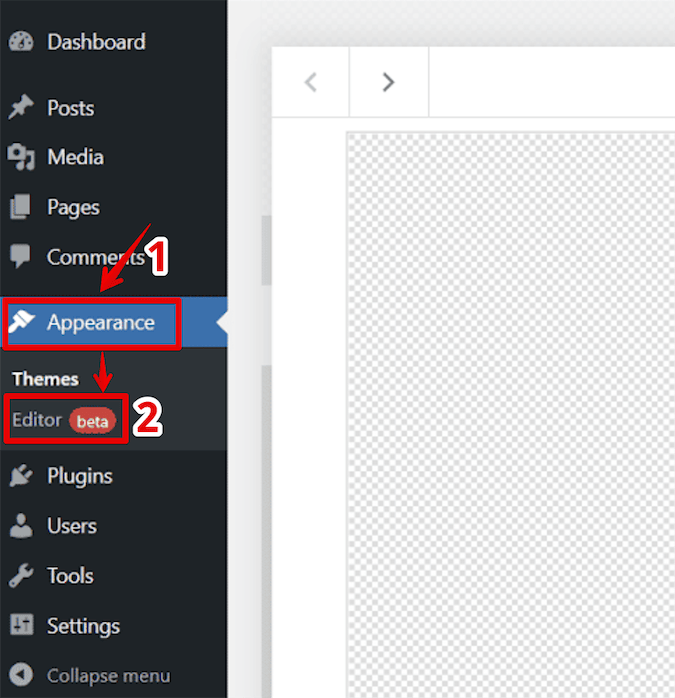
Keep in mind that if you see Appearance > Menus instead of Appearance > Editor, it means your main WordPress theme doesn’t support full site editing (FSE). In that case you may want to jump ahead to the section below for classic WordPress dropdown menu creation.
Anyway, to start adding a dropdown menu with the FSE method, select Templates or Patterns from the block editor’s main menu.
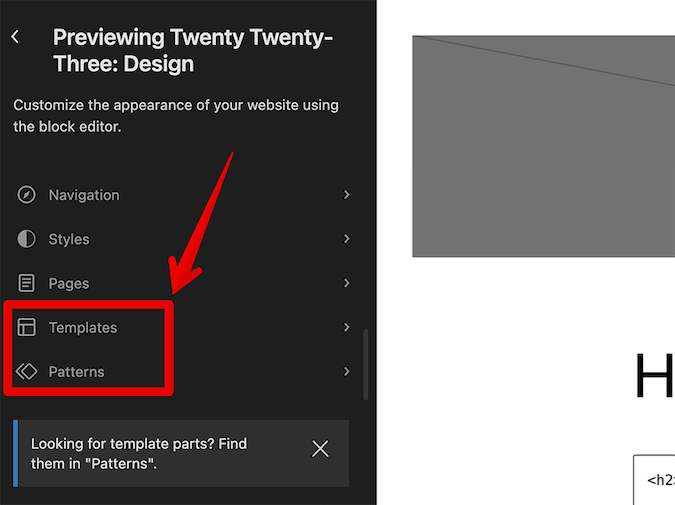
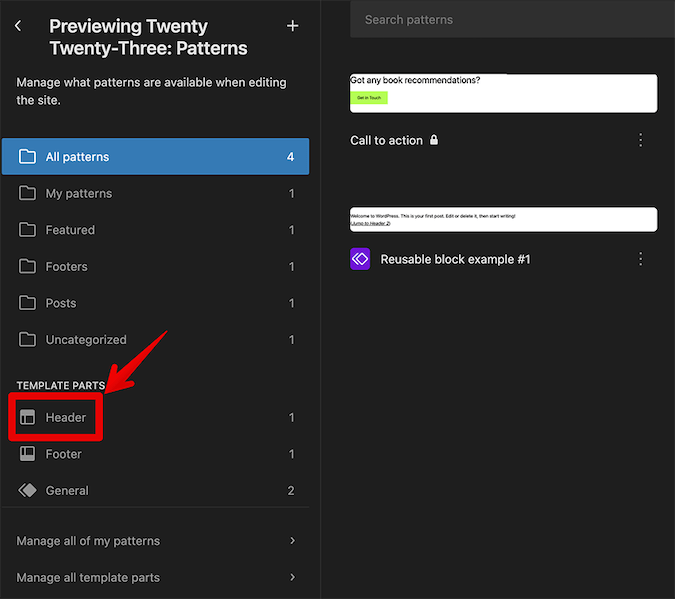
WordPress will now display all templates, template parts, and patterns featured on your site. To add a new menu, click the part with the name of the area where you want to add it. For instance, if you want to create a main navigation menu, simply select the Header part.
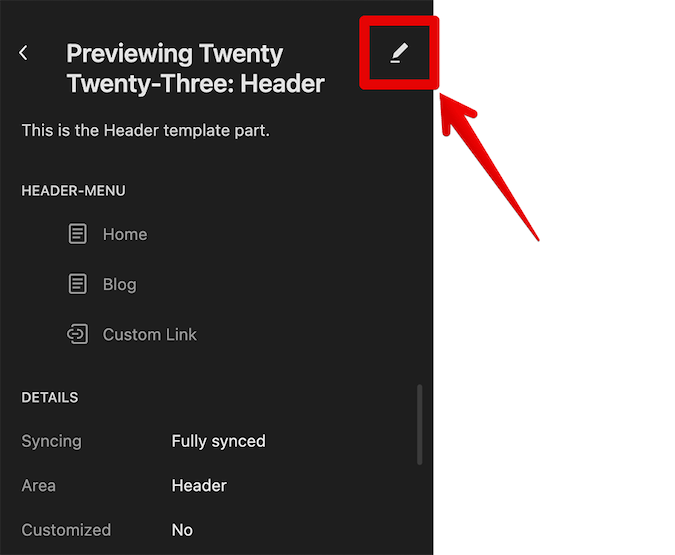
The editor will show a preview of any selected part. To edit it, click the pencil icon to the right of the title—or in this case, Header.
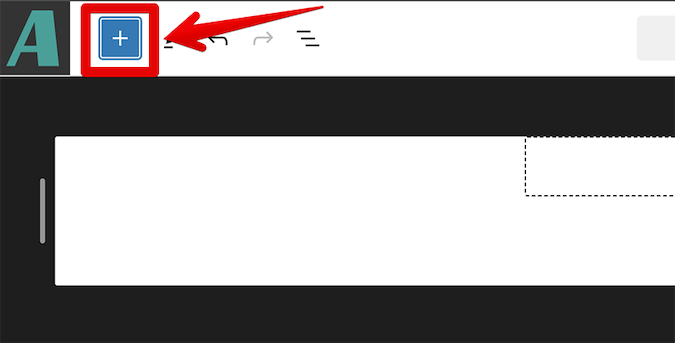
With that completed, click the plus icon in the top left-hand corner to toggle the block inserter.
Type “Navigation” in the search bar that appears.
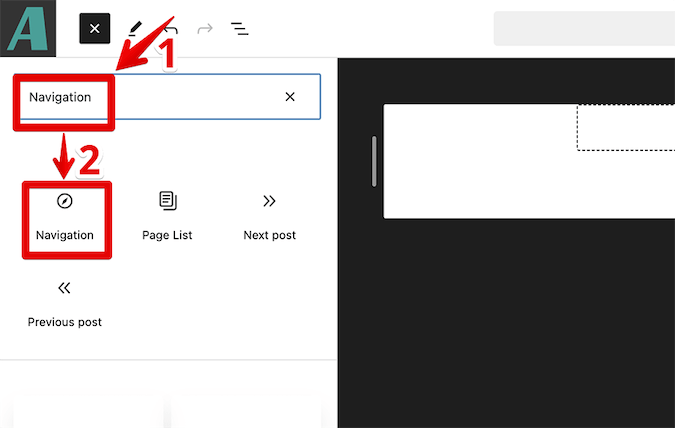
When the Navigation block appears, use the drag-and-drop method to move it to your desired location on the right-hand side in the main working area of the block editor.
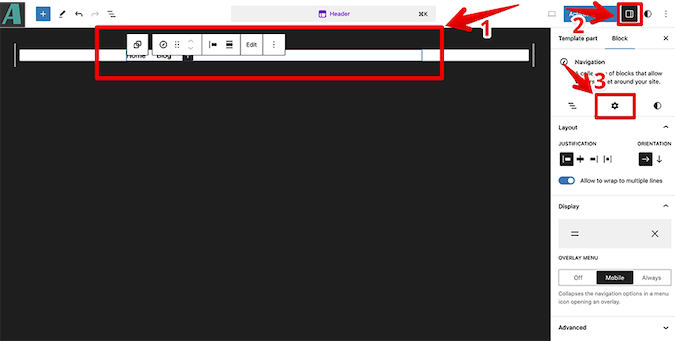
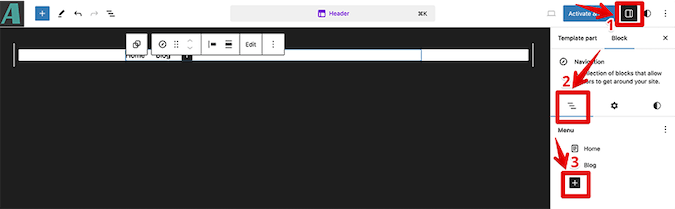
Next, click on the newly added menu navigation block to select it and click the Settings icon in the top right-hand corner. Here you can select the Gear icon to customize the justification, orientation, display, and mobile overlay of the menu.
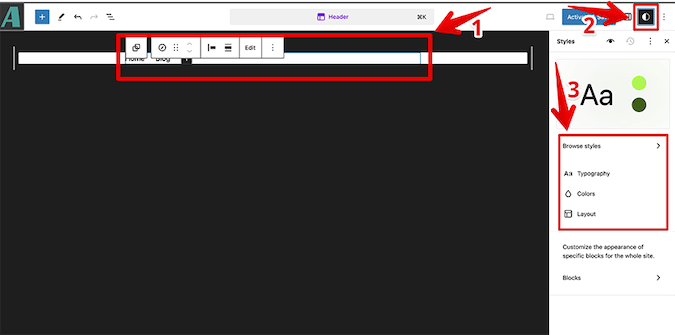
You can toggle Styles in the top-right-hand corner to further customize the styles, font, colors, and layout of your selected menu.
To add top-level items to your menu, make sure List View is toggled on under the main Settings, and then click the Plus button. The List View icon looks like three cascading lines and is located to the left of the Gear icon under the main Settings in the block editor.
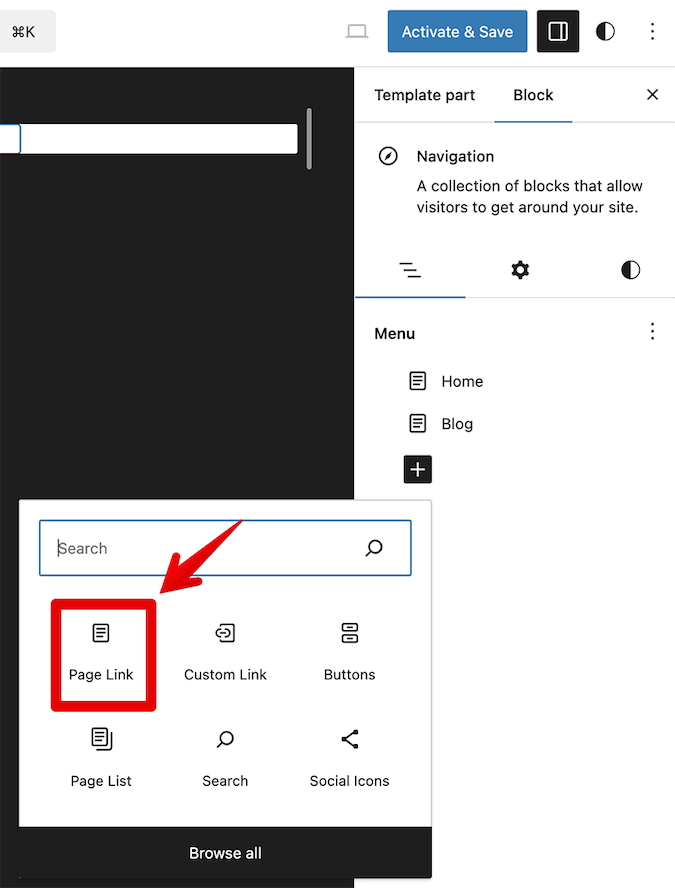
When you’re ready, click Page Link.
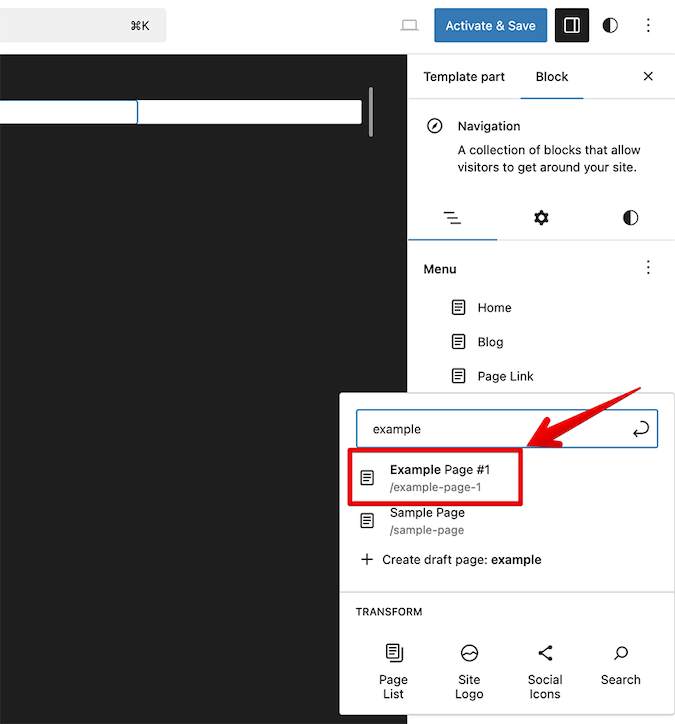
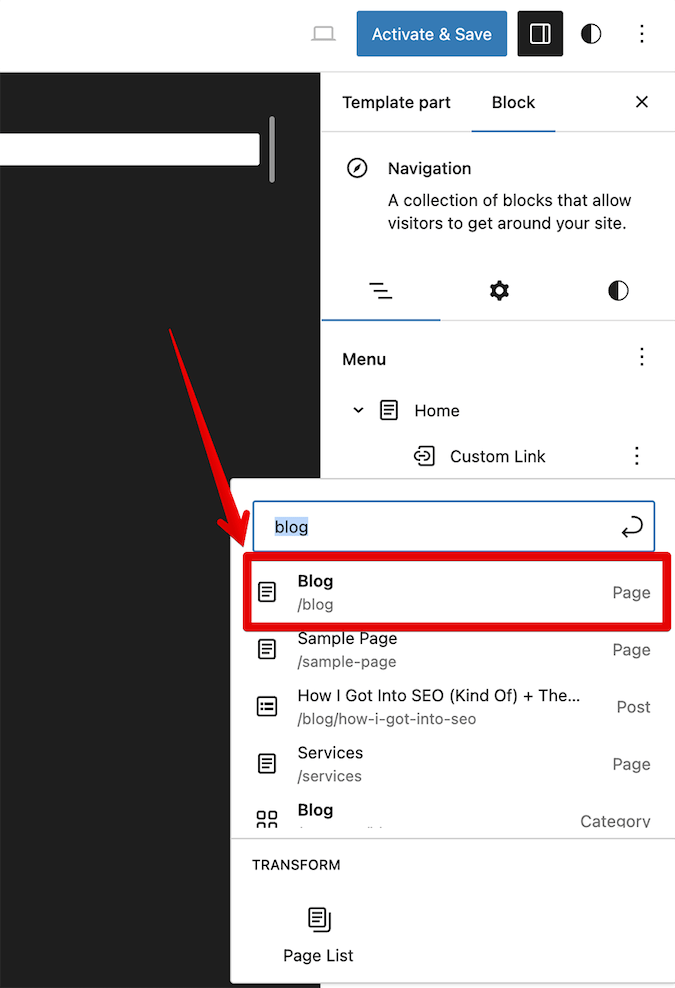
In the prompt card that appears, start typing the name of the page you want to show up as a top-level menu item in your newly created main navigation menu. Click the corresponding title or URL once it appears under the search box.
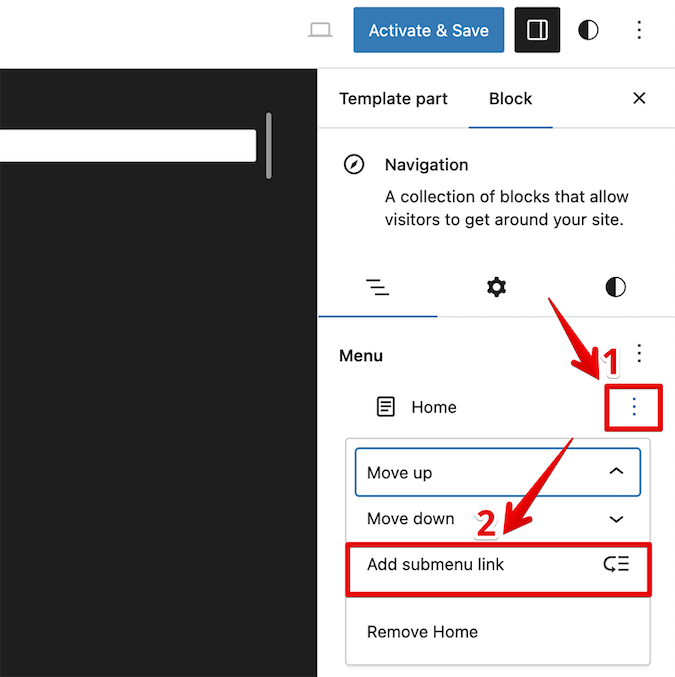
Repeat this step as many times as you need until you’re happy with your top-level menu items. Once completed, you can move on to focus on adding submenu items. Select the menu item you want to feature a submenu, click the three dots to the right of it, and then click Add submenu link.
When the prompt card appears, click to add your preferred submenu item with the same methods used above.
Again, repeat this step to add as many submenu items as you like. When you’re happy with the number of items in your new menu, click Save to save your changes.
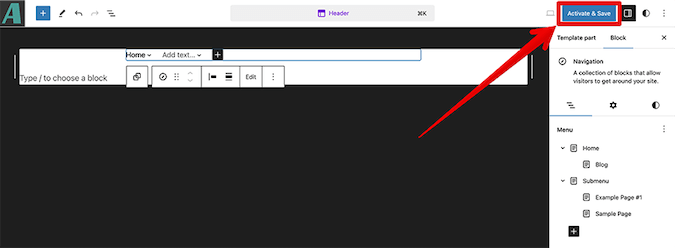
Keep in mind that if your FSE-compatible theme isn’t active, the button will read Activate & Save instead of just Save. You’ll need to activate your theme and save your menu parameters to see the changes reflected on the frontend of your site.
Using a Classic Theme? Create Dropdown Menus In WP Admin
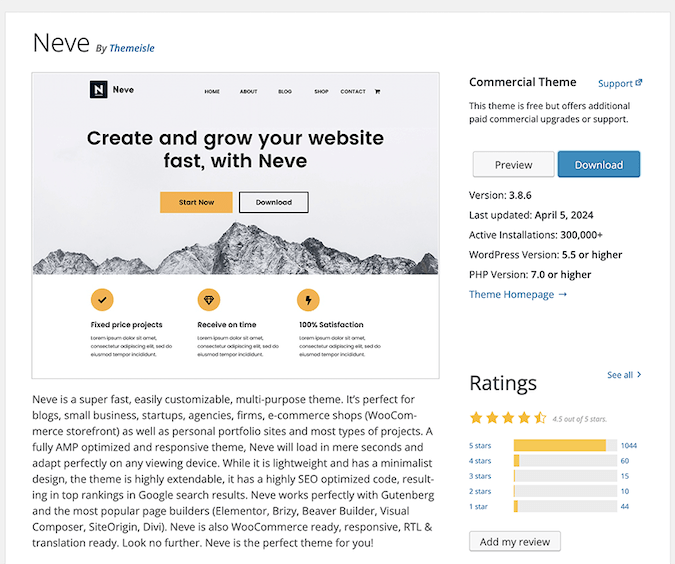
If you can’t or don’t want to use FSE, most classic WordPress themes—including Astra, Neve, and OceanWP—support creating dropdown menus via the WP Admin dashboard.
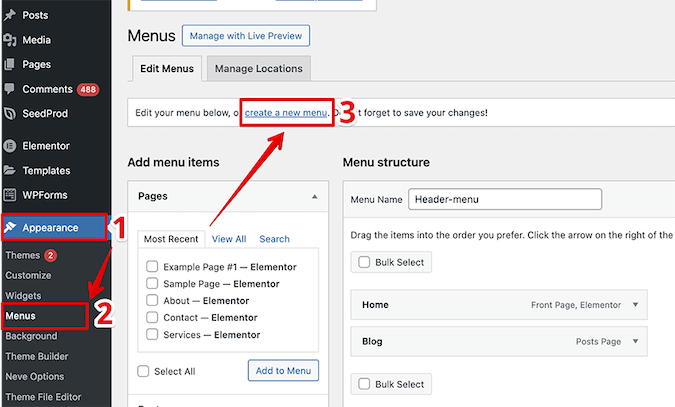
To start, navigate to Appearance > Menus on the left-hand side of your WordPress dashboard and click the hyperlink that reads create a new menu.
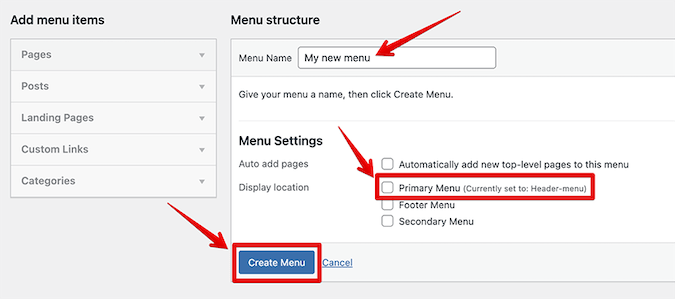
Next up, you’ll need to create a name for your main navigation menu. Be aware that this name will be used inside the admin dashboard area, but not on your site’s frontend.
After naming your new menu, click the Create Menu button. WordPress will create a new menu for you automatically. Also, if you intend for this to be your primary menu, check the box next to Primary Menu in the Menu Settings area.
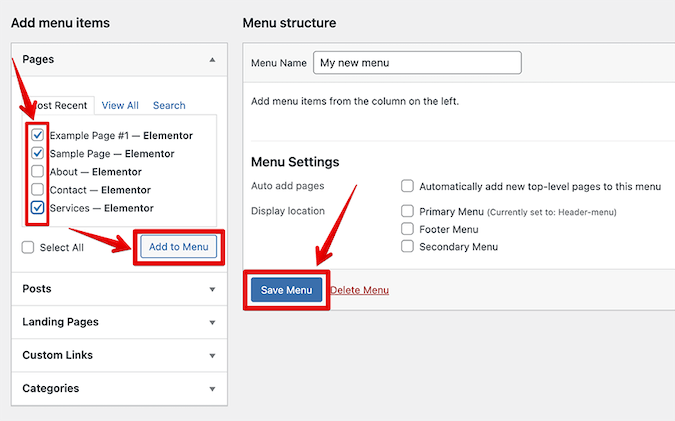
Next, you’ll need to add items to your new menu. These items will appear directly underneath your main navigation menu and will serve as parent links to all the other specified pages, posts, landing pages, custom links, and categories.
From the left-hand column, check the box next to each item that you want to add to your new menu. Click Add to Menu and WordPress will automatically add your selected items to the new menu.
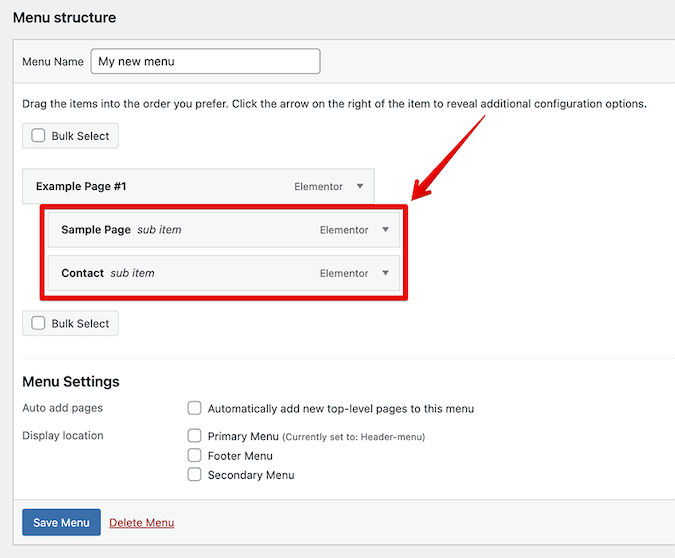
Your items will now appear in the right-hand column, but they’ll show up as regular menu items in the top row by default. To make them submenu items, drag and drop them under the parent menu item of your choosing. Then, move it slightly to the right for the preferred item to become a submenu item. Don’t forget to click Save Menu to save your changes when you’re done.
Assuming you’ve selected the new menu as your primary, secondary, or footer menu, you should now be able to visit your site and see how the menu looks on the frontend.
Best Plugins to Create Dropdown Menus in WordPress
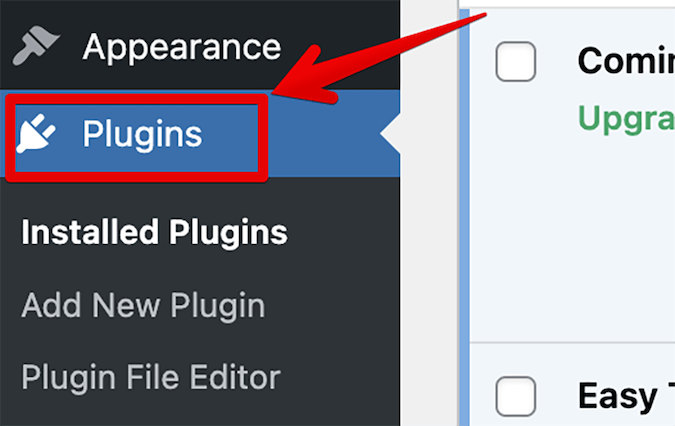
Another easy option for creating dropdown menus in WordPress comes by way of third-party plugins that are offered directly on the platform. There are multiple menu plugins to choose from, and you can find any that you download under Plugins on the left-hand side of your WordPress dashboard.
Two solid options to give a try are Max Mega Menu and Responsive Menu. If you’re concerned with WordPress Pricing, the former has a free version with basic support.
Max Mega Menu
Max Mega Menu is a complete menu management solution that lets you convert your existing menus into much larger menus. Aside from creating dropdown menus, you can also add any WordPress widget to your menu, restyle it, and adjust its behavior however you see fit.
Some of Max Mega Menu’s main features include:
- Compatibility with the existing WordPress menu system
- Support for multiple menu locations
- Support for individual configurations of each menu
- Full customizability of menu layouts and styles
- Support for multiple menu transitions such as fade, fade up, slide up, and slide sub
This menu-builder also supports accessibility features with built-in keyboard navigation for the following keys:
- TAB. Turns on keyboard navigation and navigates to the next element in the menu.
- ENTER, SPACE. Shows or hides the submenu—as long as the arrow indicator on a submenu is highlighted.
- ESCAPE. Closes all submenus.
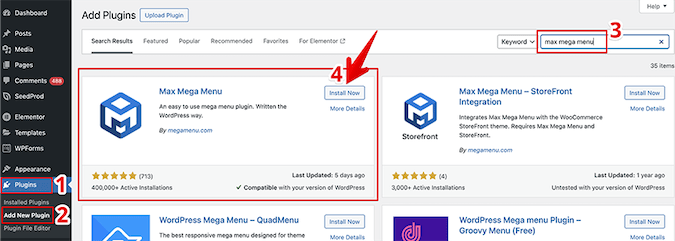
To download, install, and activate the Max Mega Menu plugin, navigate to Plugins > Add New > Plugins and type “Max Mega Menu” in the search bar, then click Install Now on the corresponding plugin card.
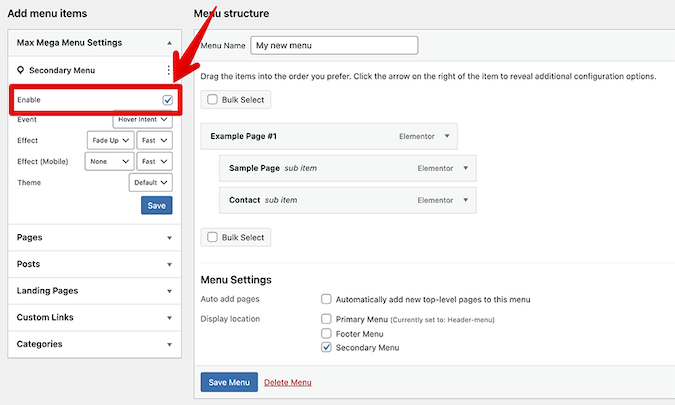
Next, go to Appearance > Menus, select your preferred menu, and assign it to one of the display locations offered by WordPress. Click Save Menu to enable the plugin’s settings.

To activate the menu, check the box Enable in the left-hand column under Max Mega Menu Settings.
Next, hover over the item you want to convert to a mega menu in the right-hand column and click the blue Mega Menu button that appears.
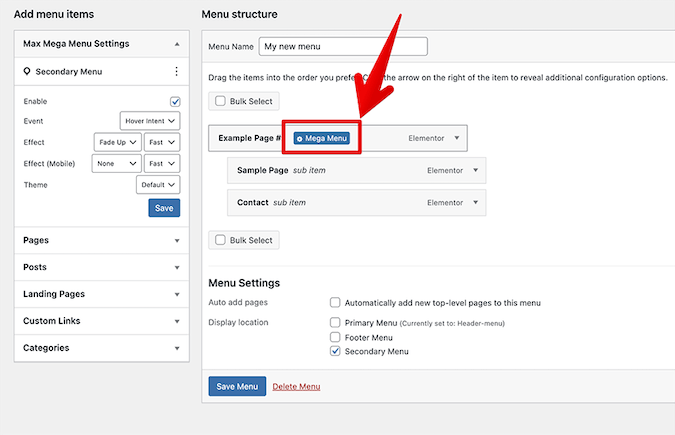
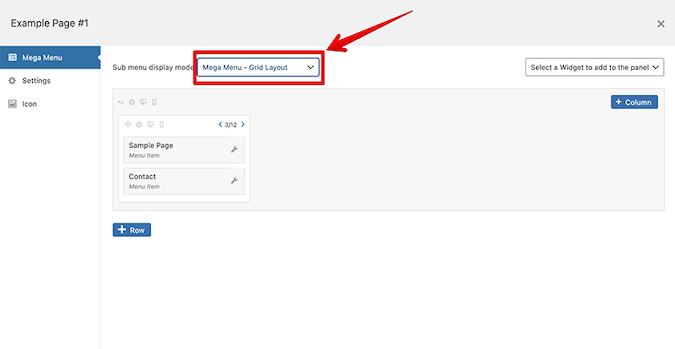
Here, the submenu items should be set in the Flyout Mode by default. To convert them into a mega menu, click on Mega Menu – Grid Layout. This should cause all menu items to be displayed in the grid layout editor as fully customizable boxes—which you can then drag and drop into existing or new columns and rows according to your preferences.
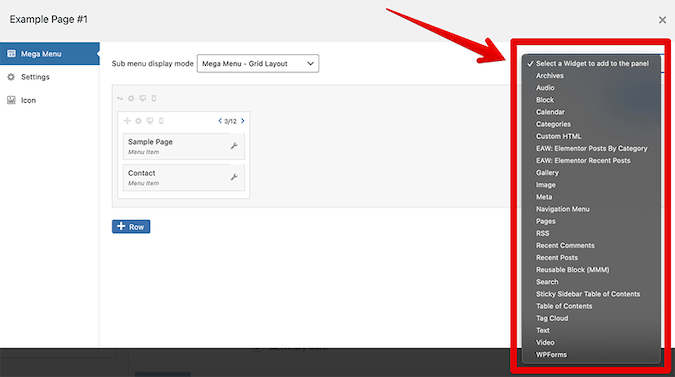
Lastly, don’t forget that you can also add a variety of widgets to your mega menus as well.
Responsive Menu
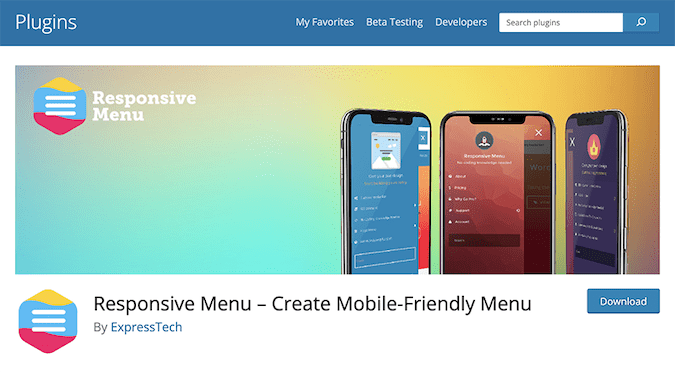
Responsive Menu is a highly customizable menu plugin for WordPress, featuring more than 150 options to create the ideal navigation for your site. The plugin comes with an intuitive user interface and it doesn’t require any prior coding knowledge to use.
Some of Responsive Menu’s functionalities include:
- Full customization options for text, background, and border-color
- Font, font size, and text alignment customizability
- Multiple submenu item depth display options
- Multiple custom menu trigger abilities
- A wide range of menu animations
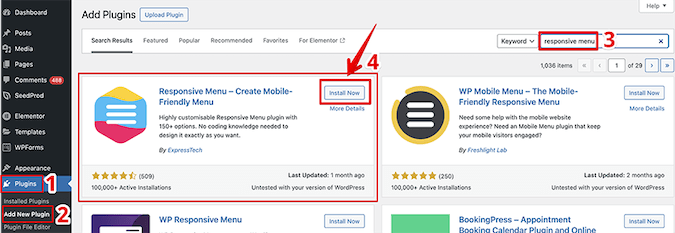
To create new dropdown menus with Responsive Menu, go to Plugins > Add New Plugins and type “Responsive Menu” in the search bar. Click Install Now on the associated plugin card.
Next, navigate to Plugins > Installed Plugins on the left-hand side in your WP dashboard, locate Responsive Menu, and click Activate.

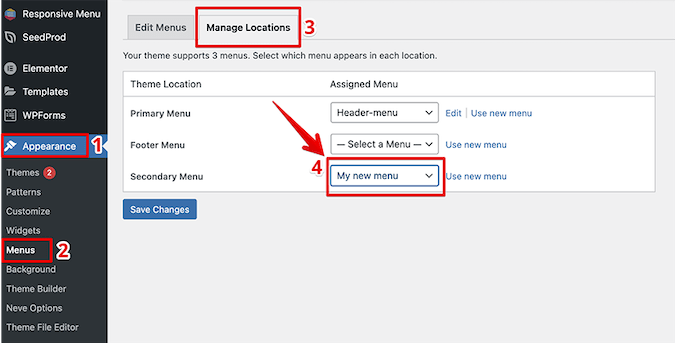
Once you’ve activated the plugin, navigate to Appearance > Menus and select the tab Manage Locations. From there, assign the new menu to your preferred location. You can choose any location among the primary, secondary, and footer options as long as your theme supports it.
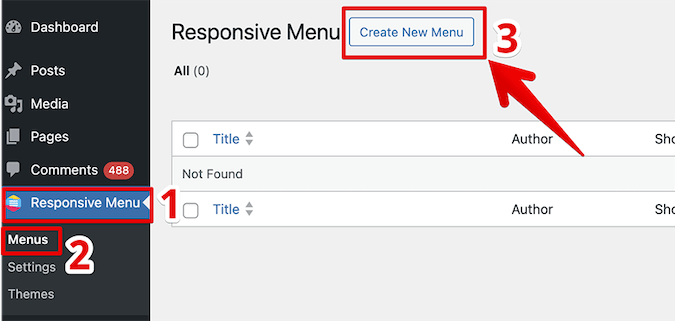
When that’s finished, navigate to Responsive Menu > Menus and click Create New Menu.
Pick a menu theme and click Next.

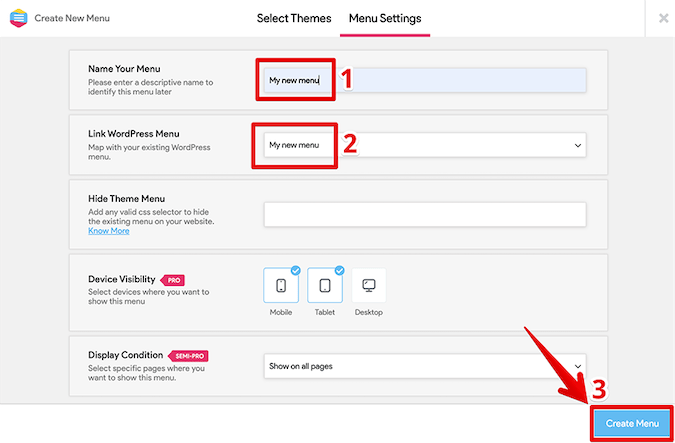
In the Menu Settings tab, make sure to name your new menu and map your existing WordPress menu to it. Finally, click Create Menu.
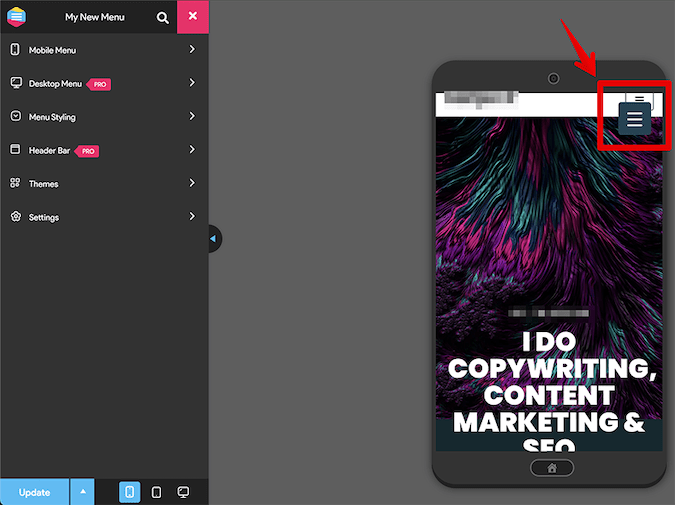
At this point, be aware that your existing WordPress theme menu might overlap with your new responsive menu.
To resolve this, right-click on the existing WordPress menu and click Inspect. Now you need to identify and copy your existing CSS menu selector, so go to Settings > General Settings on the left-hand column and paste the menu selector in the Hide Theme Menu text field.
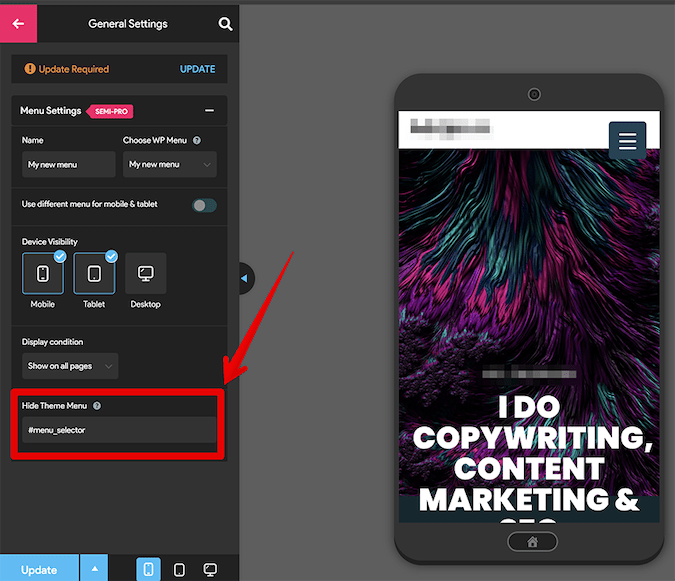
The existing menu selector will be different for each WordPress theme.
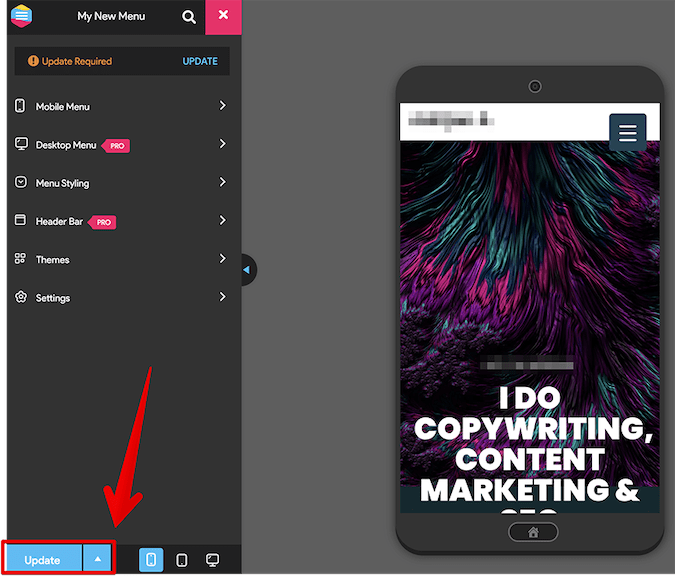
Once you’re happy with your new menu, click Update to save the changes.
Recap
Dropdown menus can be a great tool for pointing your website’s visitors to the right pages without sacrificing the existing design of your WordPress theme. You can build dropdown menus on WordPress in three main ways: via the full site editor (FSE), via the native WP admin menu dashboard, and via third-party WordPress plugins like Max Mega Menu and Responsive Menu.
If you liked this guide, you might also like to read how to build a WordPress website in five easy steps.