You have a website up and running, and even better, people are visiting it. The problem is, you’re not making money yet.
Fret not.
Google AdSense is one of the best ways to monetize your site, and adding it doesn’t have to be as complicated as you might think.
Our guide below will show you how to add AdSense to your site so you can start turning those visitors into dollars.
#1 – Sign Up for AdSense
Before anything else, you’re going to need to sign up for Google AdSense. Of course, if you’ve already been accepted and want to know how to place the ads themselves, feel free to skip to step two.
For everyone else, start by heading over to the AdSense homepage.
Click the blue Get Started button once there, like so:

You’ll be taken to a page like this where you need to put in some details:
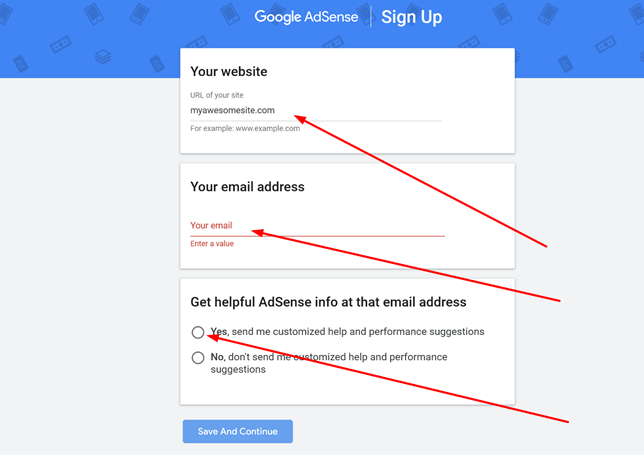
Fill in the URL of your site, your primary email address, or one related to your site, and we recommend clicking Yes where it asks for customized help from AdSense.
Once done, click Save And Continue to proceed.
The next page will ask you to select your country and to accept some terms and conditions. Fill in all of that, and then click Create Account:
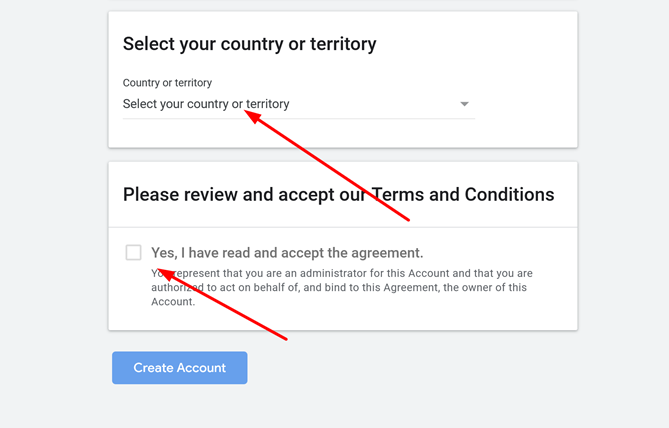
That will have created your account.
Now we need to fill in some basic payment details and your address. Fill these in as required, and then verify your phone number for enhanced security, like so:
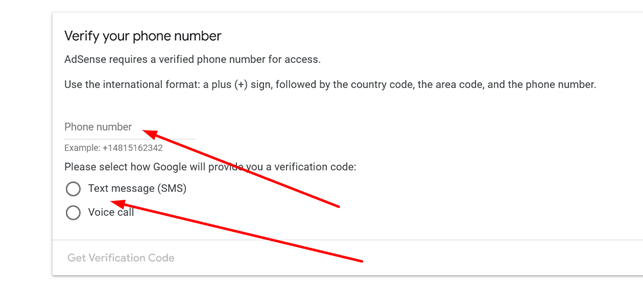
Don’t forget the format required for the number is based on your location and area.
Upon successfully doing that, you’ll be given an AdSense code that you’ll need to paste into your site’s HTML.
This sounds complicated, but it’s not as bad as you might imagine—there are two ways to paste in the AdSense code.
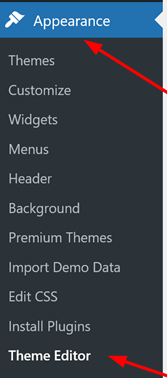
First of all, you can add it to a WordPress site through the Theme Editor under Appearance on the dashboard:
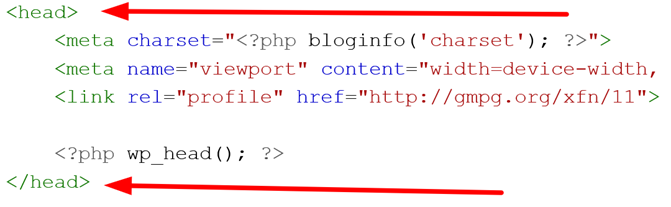
Be sure to paste the code between the <head> and </head> tags like so:
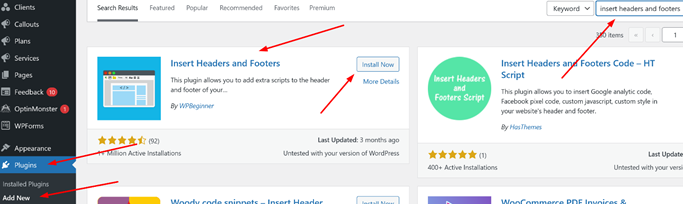
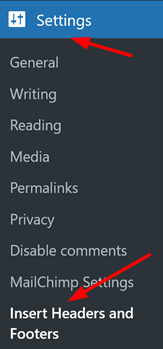
If you’d prefer the plugin route, go to Plugins, Add New, and search for Insert Headers and Footers. Install and activate the plugin:
Almost done.
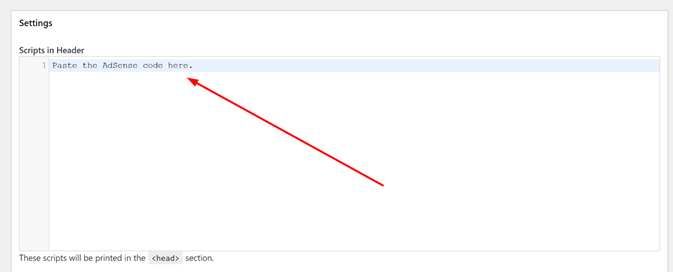
Now all you need to do is go to the Settings of the Insert Headers and Footers plugin and paste your code into the first box:
The header box looks like this:
Save everything up on WordPress, and then head back to the AdSense page. It will look something like this:
Click that you’ve pasted the code into your site, and then click on Done.
Google will now review your site and will let you know when you’ve been approved. This can take anything from three days to three weeks. You will have to be patient as Google has to review your entire site for ad suitability.
To increase your chances, be sure to leave the pasted code where it is, and ensure your site looks presentable, well-organized, and has some high-quality content on display. Ideally, you should complete the latter before submitting it to Google.
You’ll also need to confirm you have some traffic coming to your site daily—there need to be people available to view the ads.
#2 – Generate the Manual Ads Code
So, let’s imagine a few days or weeks have gone by, and the good news is that Google has approved you for AdSense.
Alternatively, you were already approved and now want to place the ads on your site.
Either way, we can now start placing ads on your website. The first way to do this is through manual ads.
Start by going to the AdSense dashboard, and look for where it says Ads, click there, and then click where it says By ad unit.
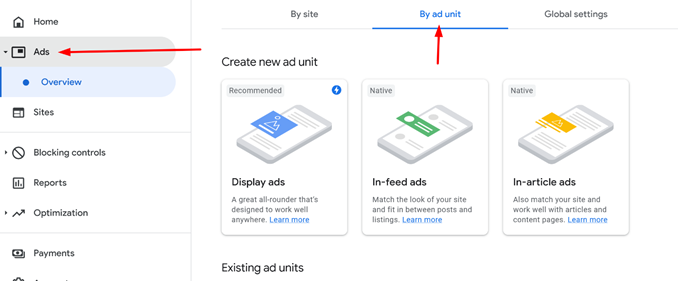
Click the type of ad you want—let’s start with Display ads.
You’ll be taken to a page overlay where you’ll need to name your ad. This is just for internal purposes, so don’t worry too much about it:
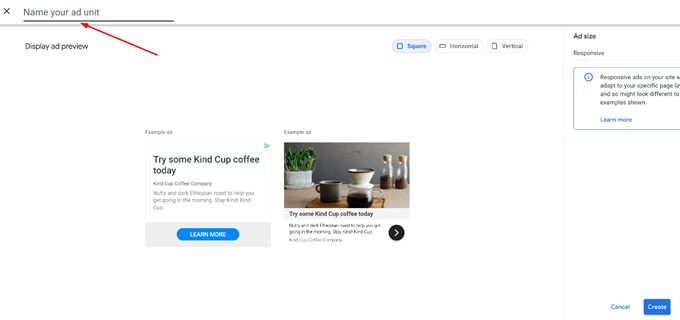
You’ll also need to choose the ad’s size and whether you want it to be responsive or fixed.
Once chosen, click the Create button.
You’ll be presented with the HTML code and the AMP code for the ad you picked, like so:
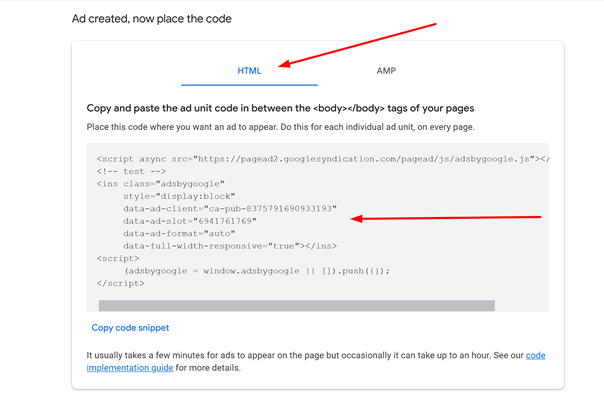
If your site is ready for AMP, you can copy these codes for your mobile pages.
For now, let’s focus on the HTML code.
We’ll need to copy this into WordPress, so be sure to keep it handy.
#3 – Place the Manual Ads Code Into WordPress
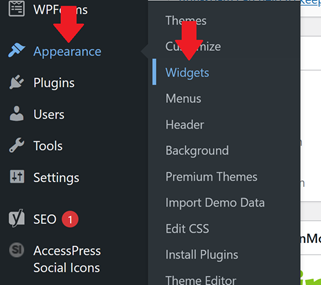
You’ll now need to think about where you want the ad to appear on your site. For example, ads in sidebars are typical and can be achieved through the use of widgets.
So, on your WordPress dashboard, navigate to Widgets under Appearance like so:
Once done, you’ll want to click on the Custom HTML widget and drag it to where you want the ad to show on your site.
Inside this widget, we’re going to paste in the manual ad code from before, as shown below:
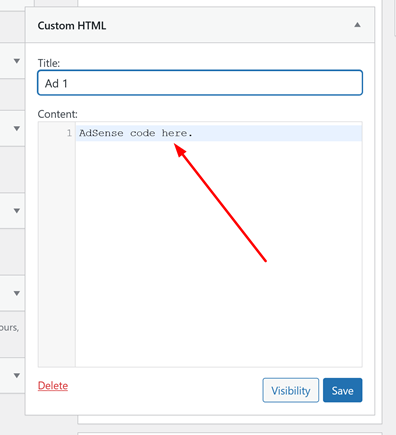
Paste the code in, and be sure to save everything by clicking the Save button down below.
That’s all it takes, and your ads should start showing up in the sidebar in a matter of hours. Although, expect it to take longer than this. There’s no exact time.
Place different ad units around your site using this method, but be sure not to overload your site with ads either.
In terms of the best placement for them, you need to think about where people are most likely to look. Sidebars are a reliable option, certainly alongside gripping written content.
Header ads can work well, but a lot of this depends on your pages’ design and content. Ads need to be easily viewable but not intrusive enough to frustrate visitors.
Of course, most of all, it’s helpful if your ads are relevant to your site content.
For now, enjoy having ads on your site and adapt your strategy over time.
Next, we’re going to cover another way of placing ads on your site.
#4 – Generate the Auto-Ads Code
The second option is to use auto-ads. The idea behind these ads is that you don’t have to think about placements, and you’ll save time using them too.
Of course, you won’t be picking where the ads go, so it may be better to use the manual ads approach for some.
To use auto-ads, go to your AdSense dashboard again and go to where it says Ads and click By Site.
You should see something like this:

You want to click Get code here to generate your auto-ads code. AdSense will now create a code for you, allowing you to use auto-ads.
An overlay like this will appear:
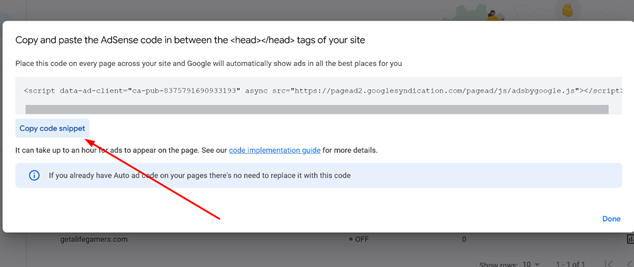
We want to click where it says Copy code snippet.
We will be pasting this into your site in the next step.
#5 – Place the Auto-Ads Code Into WordPress
We have the auto-ads code: now we need to put it into your WordPress site as we did before with the manual ad codes.
There’s a slight difference here, though. Our auto-ads code will generate ads everywhere on your site, so you’ll need to place the code on all of the pages where you want them to appear.
A quick way of doing this is to paste the code into the Theme Editor between the <head></head> tags of your site, but any update or change to your site will remove this code.
Over time, a site goes through many changes, and you can expect this code to disappear. It can be tedious to keep putting the same code back into your site.
Luckily, there’s a better solution here.
We’re going to use our old friend, the Insert Headers and Footers plugin. If you’ve followed this guide through each step, you should already have this plugin installed and activated on your site. If not, feel free to install it with a quick search.
We want to go to Settings again and click on Insert Headers and Footers:
You’ll be taken to a page that looks like this:
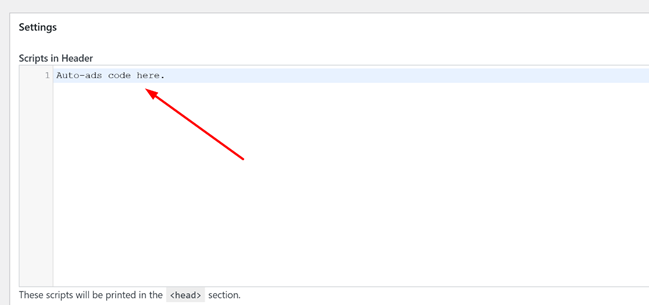
We need to paste that auto-ads code in the Header box. Be sure to save everything.
You’re done! Ads will now appear automatically on all of your site pages, although it may take a while for them to show.
Give it a few hours before you check.