If you want to create custom post types in WordPress but aren’t sure how to do it, this article is for you.
By the end of this post, you’ll have a clear understanding of custom post types, why they’re needed, and how they’re different from the default WordPress posts.
We’ll also discuss the different ways you can use custom post types, the exact steps you should follow to create them, and the problems users face using custom post types.
Let’s dive in.
Why Creating Custom Post Types In WordPress is Worth It
One of the biggest reasons WordPress is so popular among bloggers, marketers, and website developers is its flexibility.
You can change your website’s design using WordPress themes, add new functions and features using plugins, or use widgets to add new sections to your site’s specific pages.
Custom post types is another WordPress feature that offers flexibility and allows you to turn your site from a simple blogging platform to a complete content management system.
Using custom post types, you can structure your website’s content precisely the way you want instead of using the default WordPress post structure.
Ecommerce sites can use custom post types to create product pages, freelancers can use them to develop portfolios, and agencies might use them for case studies.
There’s no limit to the ways you can use custom post types for your WordPress site.
But what exactly are custom post types, and how do they differ from the default WordPress structure?
Let me explain.
What Are Custom Post Types?
When you install WordPress to your site, it comes with seven default post types.
- Posts
- Pages
- Attachments
- Revisions
- Navigation Menus
- Custom CSS
- Changesets
Posts and pages are the two most commonly used post types in WordPress.
Don’t get confused by the terminologies here.
In the WordPress database, every content type is a post. This means a page on your site is a post type in your WordPress database. Similarly, a “post” (the ones we use for publishing blog posts) is also a post type. The same goes for attachments, revisions, etc. They’re all post types for WordPress.
Every post type is used for different types of content.
For example, for publishing a static About or Contact page on your site, users choose the Page post type.
For creating blog posts, you choose posts.
Similarly, when you upload an image or any other attachment, WordPress uses the Attachment post type to display it individually.
But what if you want to publish a content type that’s not in the default WordPress post type list? For example, an ecommerce product page or a portfolio page for your agency.
This is where Custom Post Types come in.
A custom post is simply another type of post in WordPress designed for a specific content type.
You can use it to enhance your content’s appearance and customize your site according to your audience’s needs.
For example, you can use the default Page type for creating a product page. But you’ll either need to use tables, a visual site builder, or a plugin to create a uniform structure for your product pages.
With a custom post type, you can create a new post type for your product pages and use it every time you want to upload a new product.
The same applies to any other unique content type you want to add to your site, which doesn’t fit into the default WordPress post types.
How Custom Posts Are Different From Default WordPress Post Types
Every post type in WordPress has different attributes and features.
For example, the Post post type in WordPress is used for blog content and is different from the Page post type.
When you publish a post, it appears on your site’s blog, pages don’t.
You can assign tags and categories to your blog posts, not pages.
Similarly, you can assign a parent page for every new page. There’s no such option for posts.
Let’s take the example of an attachment page (another post type).
WordPress creates individual attachment pages for every file you upload.
But those pages don’t appear in your blog roll or on any other page. They also don’t have the option of a featured image or parent page. If you want those options, you need to create a custom post with those options included in it.
When you create a custom post type, you can decide its attributes and the additional options you want users to have when publishing content.
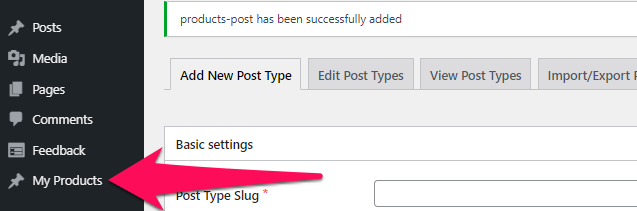
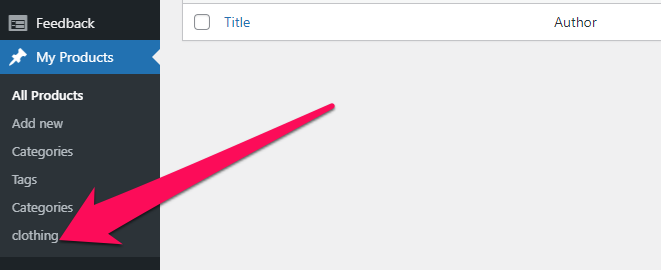
Once created successfully, custom post types appear in your WordPress dashboard as a content type with its own menu.
For example, in the screenshot below, Products is a custom post type.
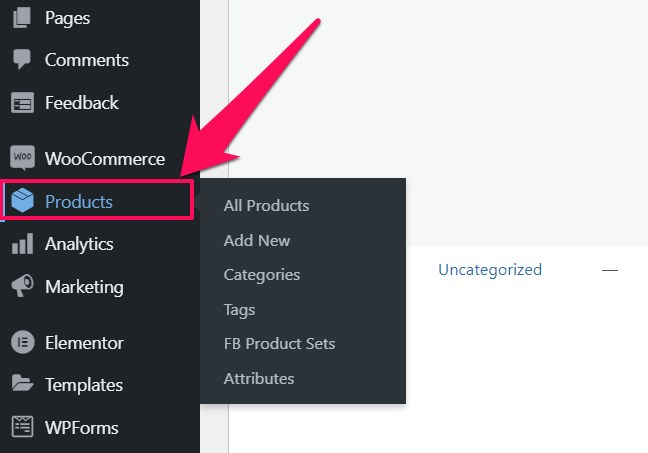
Let’s say you want to add a new post type, Products, for your ecommerce store.
You can enable the following attributes for this custom post type:
- Featured Image
- Product Image
- Price
- Quantity
- Description
To add some of those attributes, for example, Pirce and Quantity, you can use Custom Fields (another WordPress feature) on your page.
For tags and categories for your page, you can use the custom post types feature.
Let’s say you enable categories on your Product page for different product types.
Whenever you add a new product, you can assign a new category, for example, kids’ wear, men’s wear, women’s wear.
Each category page (for example, Kid’s Wear) will show the list of all the products assigned to it.
This will allow you to organize your content better and make it easier for your website visitors to navigate.
The Investment Needed to Create Custom Post Types In WordPress
Like most other features in WordPress, creating custom posts does not cost you anything.
You can create as many custom post types as you want.
However, there are two different ways to add custom post types, and depending on your choice, you might want to invest money in hiring a WordPress expert.
Creating Custom Post Types Manually
The first method to create custom post types in WordPress is by manually adding the required code to your site’s functions.php file.
This is the more efficient way of creating custom post types because it helps you keep your site’s code clean and organized.
However, we recommend that you only follow this method if you’re confident about your coding skills, or if you plan to hire a WordPress expert to do it for you.
For most other users, we recommend the second method: using a plugin.
Creating Custom Post Types With A Plugin
The easier and safer method for creating custom post types is by using a WordPress plugin.
You can use several free plugins to add custom post types, but we recommend using Custom Post Types UI.
It’s a lightweight plugin with easy-to-understand options and a simple configuration panel.
Using this plugin, you can create new custom post types and custom taxonomies for your WordPress site.
You don’t need to be familiar with WordPress code or have any technical skills to use this plugin.
Let me explain how to use it.
4 Steps to Creating Custom Post Types In WordPress
You can easily create custom post types in WordPress using the Custom Post Types UI plugin.
Here’s the step-by-step process you need to follow.
Step 1 – Install And Activate The Custom Post Types UI Plugin
The first step to creating custom post types for your WordPress site is downloading, installing, and activating the Custom Post Types UI plugin.
Here’s how to do it.
– Login to your WordPress website dashboard
– Click Add New under Plugins in your WP dashboard.
– Search for Custom Post Types UI plugin in the search box on the plugins page.
– Click Install Now to download the plugin to your site.

– Click Activate to start running the plugin.

If your plugin is successfully installed and activated, it will redirect you to its welcome page.

You can now see the plugin in your WordPress dashboard’s left menu, titled CPT UI.
Step 2 – Create Custom Post Types
Now that you’ve installed the relevant plugin, it’s time to configure it properly and create your first custom post type.
Here’s how to do it.
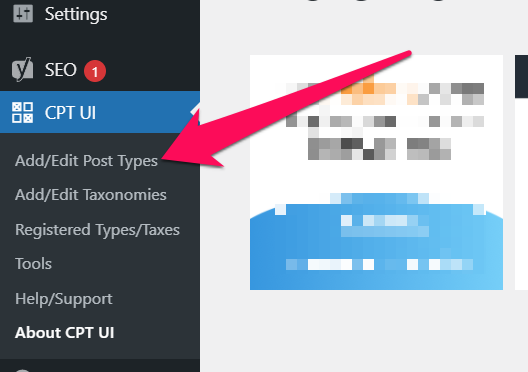
– Click on Add/Edit Post Types under CPT UI in your WordPress dashboard’s left menu.
– The Add/Edit Post Type section is where you will create your new custom post type. This page has three different areas – Basic settings, Additional labels, and Settings
– Start from Basic settings.
– In the Post Type Slug field, give your custom post type an alphanumeric slug (URL). You can also use Latin characters, underscores, and dashes in the slug. For reference, the slug for Page post type is “page.” So if your new custom post type is Products, use the same word in the slug for easier identification.
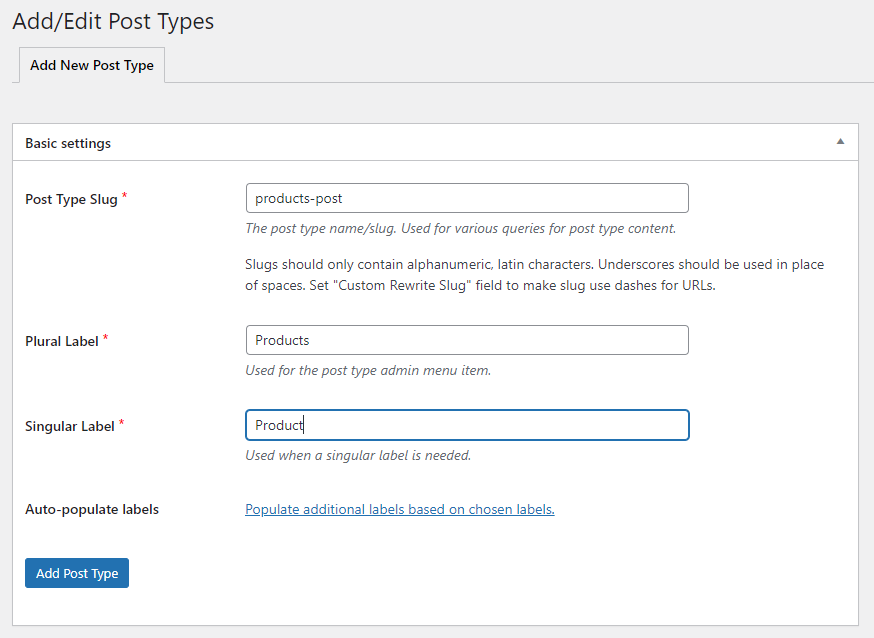
– Next, give your custom post type a Plural label that will be displayed in your dashboard and everywhere else on your site (e.g., Products). In the Singular label field, use the singular form of your label (e.g., Product).
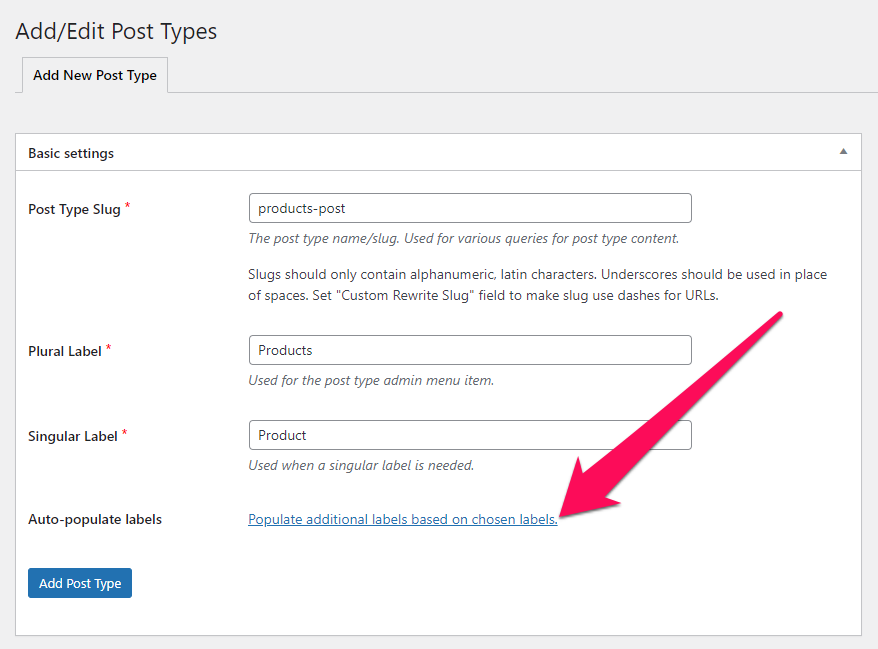
– Click on the link below the Singular Label field to automatically populate the fields in the Additional labels section based on your chosen labels.
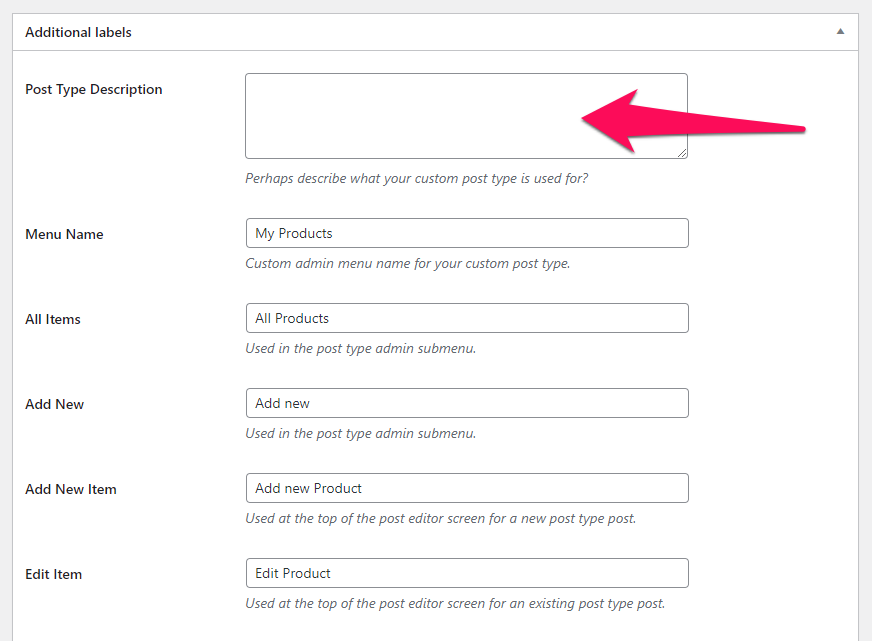
– Now, you only need to add a short description of your custom post in the Additional labels section. This is for your reference and won’t be visible to your website visitors.
– Now scroll down to the Settings section at the end.
In this section, you can configure your custom post type’s properties and how it appears in your WordPress admin dashboard and on your website.
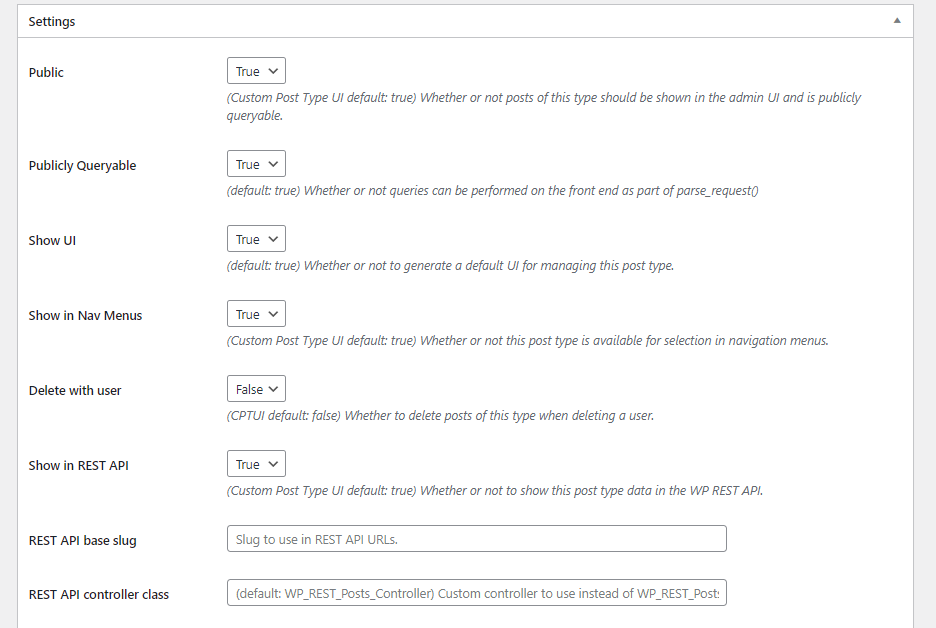
– For example, in the screenshot above, you have the option to show your custom post type in the navigation menus of your site.
– Further down the list, you have the option to enable archives for your custom post type. Setting this to True will create a dedicated listing page for your custom post type (like a category page.)
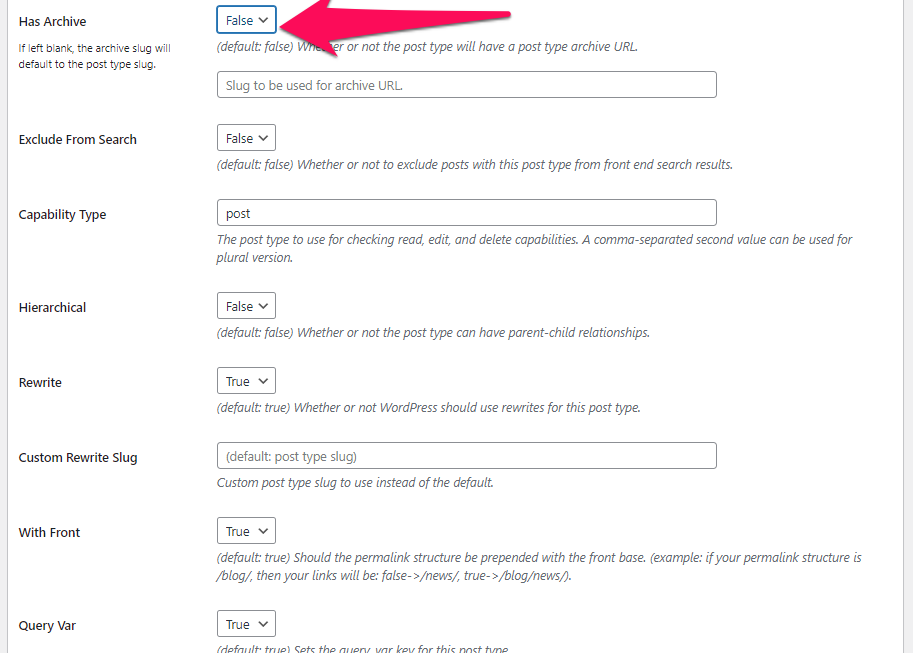
– You can also enable parent-child posts for your post type using the Hierarchical setting.
– At the bottom of the Settings section, go to the Supports label.
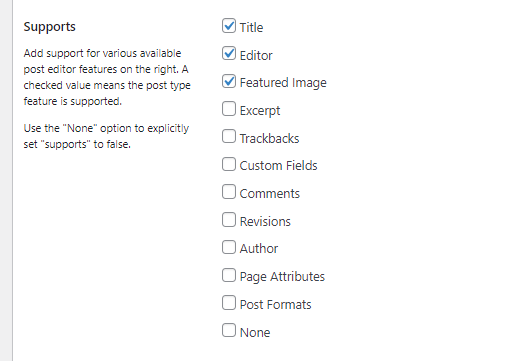
– This is where you can enable or disable different WordPress editor features for your custom post type.
– And finally, you have the option to choose any existing taxonomies for your custom post type.
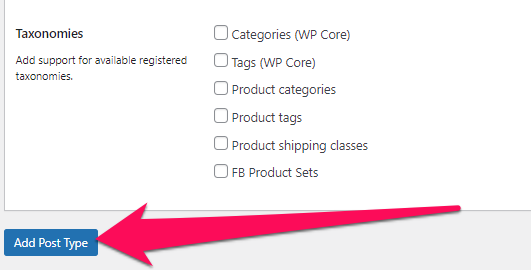
– Click Add Post Type once you complete the settings.
Your new custom post type is now visible in your WP dashboard.
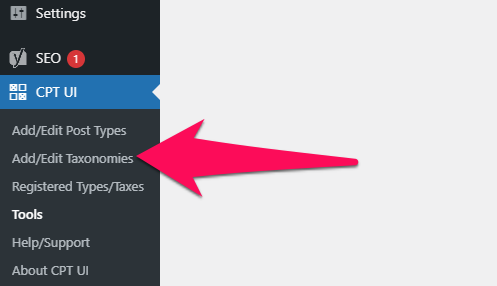
Step 3 – Create Custom Taxonomies
You can also use the CPT UI plugin to create custom taxonomies and link them with different post types.
Here’s how to do it.
– Click Add/Edit Taxonomies under CPT UI in your WordPress dashboard.
– The settings for taxonomies are much more straightforward. Just enter a slug, singular, and plural labels, and associate the taxonomy with your custom post type.
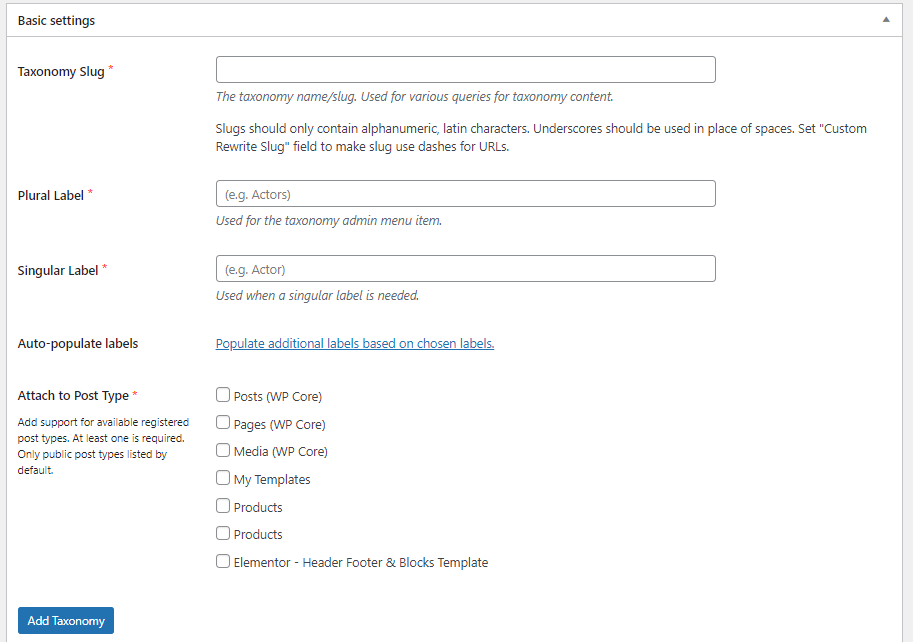
– Click the link below the form to populate the fields in the Additional labels section based on your chosen labels.
– Click Add Taxonomy to create your custom taxonomy.
Your custom taxonomy has been successfully created and linked to your custom post type.
Step 4 – Test Your Custom Post Types
Finally, to make sure your new custom post type is working fine, create a new test post.
Here’s how to do it.
– Click Add New under your custom post name label in your WordPress dashboard.
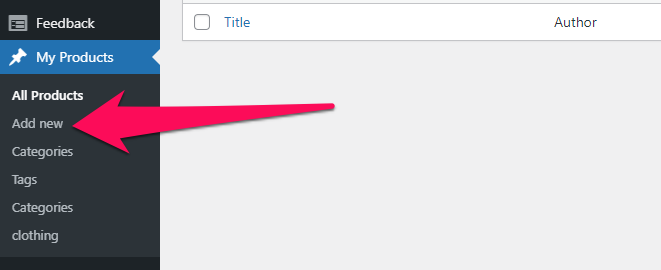
– This will take you to the WordPress editor, where you can verify if your custom post type has all the options you selected while creating it.
– To check taxonomies, go to WP dashboard→ Custom Post Type label→ Taxonomy label.
Using the same process, you can create as many custom post types as you want. However, to avoid any confusion, make sure you only create custom post types when you can’t use the existing post types for publishing your content.
Next Steps
Using custom post types is an effective way to publish different types of content on your WordPress site. However, to fully utilize custom post types, you should also understand how to use custom fields in WordPress.
Combining custom post types and custom fields will allow you to create more comprehensive content with additional details about your topic.
You can learn more about custom fields in this article.